This article will explain how to create a ticket for an issue that has occurred in the system and how to check its status.
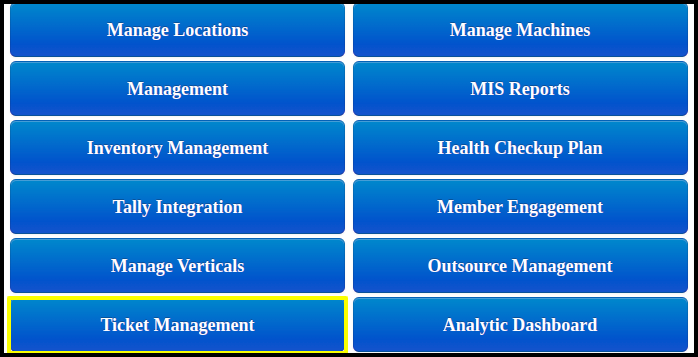
1. From the CPH Dashboard, select Ticket Management.

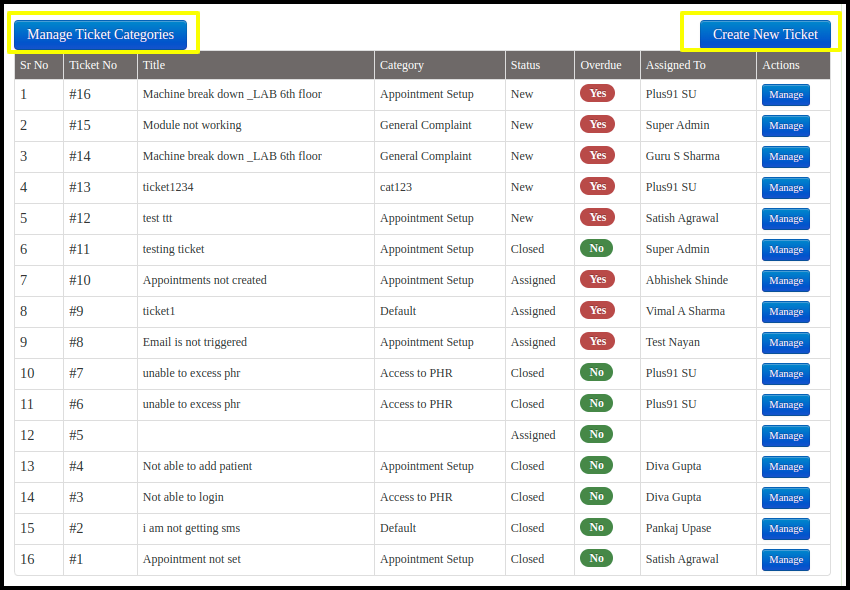
2. The Ticket Management Dashboard is now visible, allowing us to view the status of the tickets, which are divided into four categories that is
- Total Tickets : Here, you can view the total number of tickets.
- Overdue Tickets :Here, you may determine whether a ticket has passed the TAT deadline.
- Open Tickets : Here, you may view any new tickets that have not yet been resolved.
- Closed Tickets: You can view the closed tickets here to see if their problem was fixed.

3. Click the Create New Ticket button to start a new ticket.

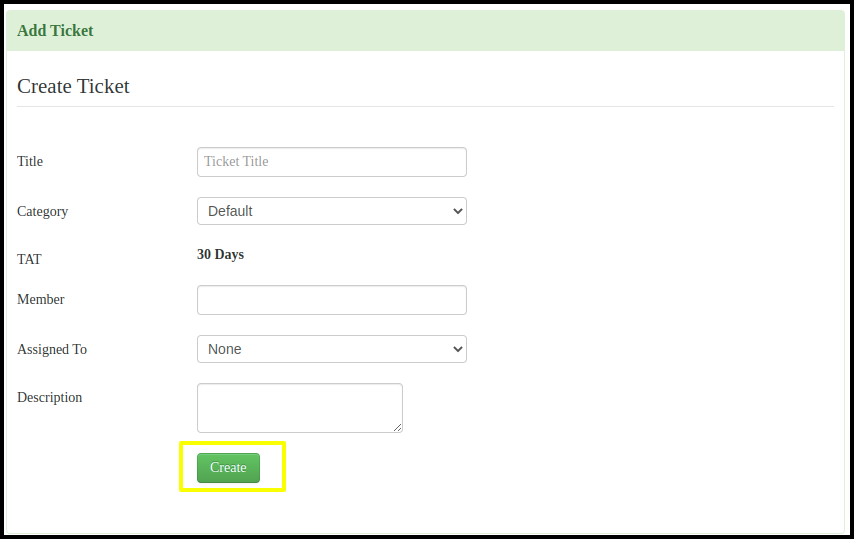
A. The system-related concern can be placed here.

- Title :You can enter the title of the system problem here.
- Category: Select the category from the drop down list
- TAT: Verify the TAT.
- Member : You should select the patient’s name from the drop-down list who is experiencing a software issue here.
- Assigned To : You must choose one of the people from the drop-down list for whom we have allocated the software issue.
- To add a new ticket to the list, click the Create button.
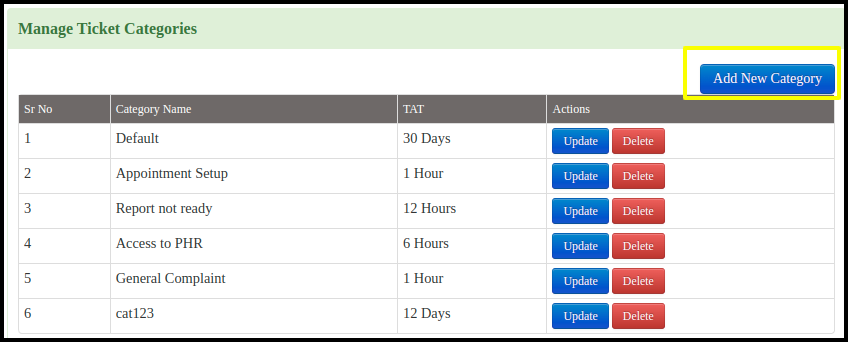
B. To create the Ticket category click to “Manage Ticket Categories” Button

- Here you can create the category of the ticket by clicking on the “Add New Category”

- Put the Category Name
- Select the TAT Type
- Set the TAT Value
- Click to “Add Category”button
- In the list of category we can update the changes
- We can remove the category by clicking the delete button