This article will guide you on ‘Manage Helpers’.
The user needs to be follow bellow steps.
1. Login into the CPH Link, the Dahsboard screen will be displayed.
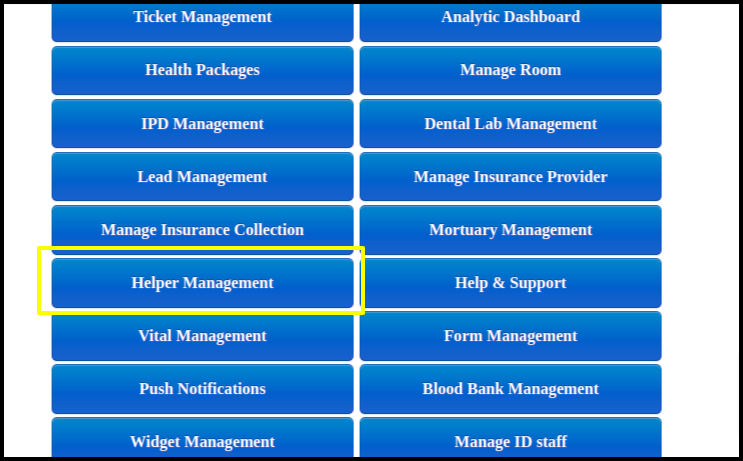
2. Click on the ‘Helper Management’ module on the Screen, it will show some of the options on the screen.
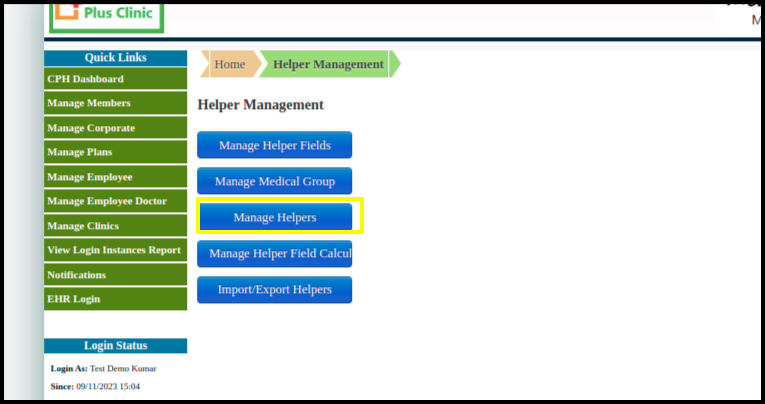
3. Click on the ‘Manage Helpers’, it will show the Created Helpers Listing.

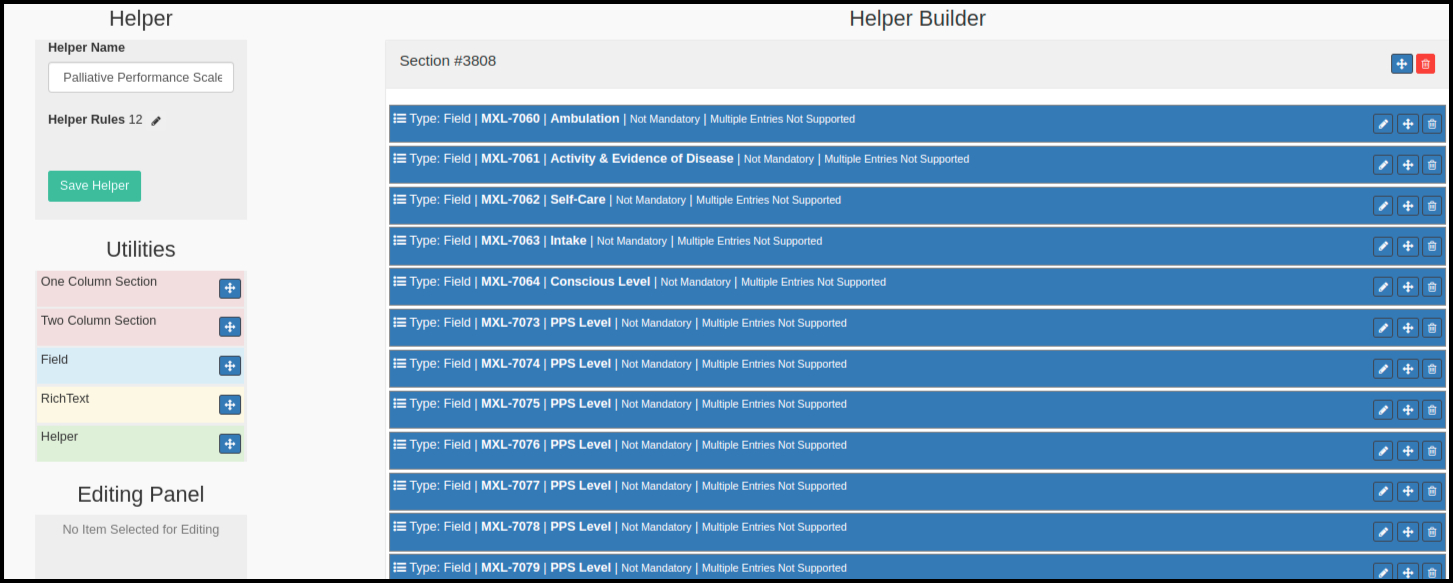
4. Click on the ‘Add New Helper’ option to create New Helper, it will show a screen where user can build a helper form.
Labels specifications:
a. Helper name: User can add a name to the Helper and click on the Save option.
b. Helper Rules: To add the rules to be highlighted/set for the helper labels.
c. Utilities:
i. One Columns Section: Here user can set the fields in one coloumn.
ii. Two Columns Section: Here user can set the fields in Two coloumn.
iii. Fields: User can set the fields using drag and drop option.
iv. Rich Text: User can set the Field name by editing on the draged field itself.
v. Helper: User can add the Helper in the Helper form.
d Editing panel:
i. Field Code: Here the Field ID for which helper user wants to will be displayed.
ii. Field Name: name of the helper will be displayed.
iii. Mandatory: Once checked on the check box, the field become mandatory.
iv. Multiple Entries: Once checked, the user will be able to add multiple entries for the same helper.
v. Print Border in PDF: Once checked the, user will be able to Print.
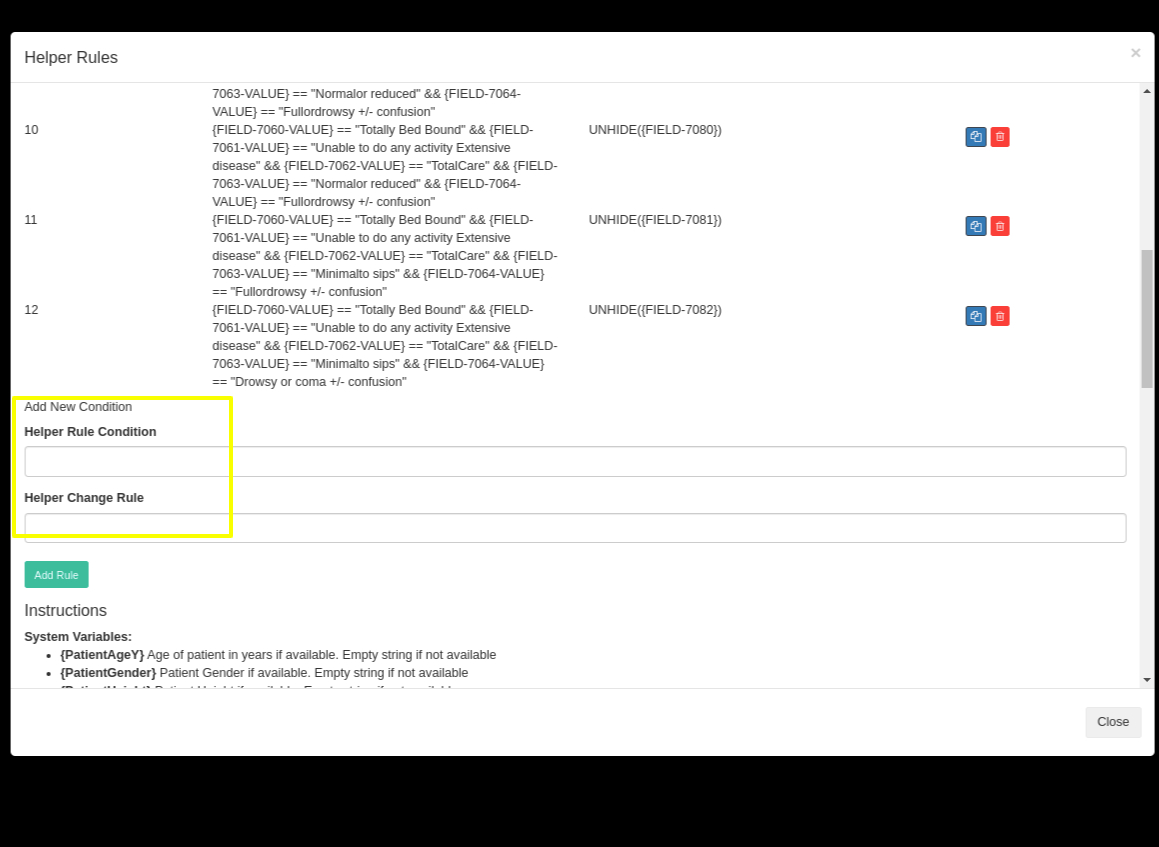
Helper Rules Edit

Here user can add the Helper rules for the specific labels for which user wants to highlighted into the EHR side.
Once added the helper form, it will be displayed on the Helper Listing Screen.