This article will guide you to use the alerts and communication.
1. Click on the Alerts and Communication module on the control panel
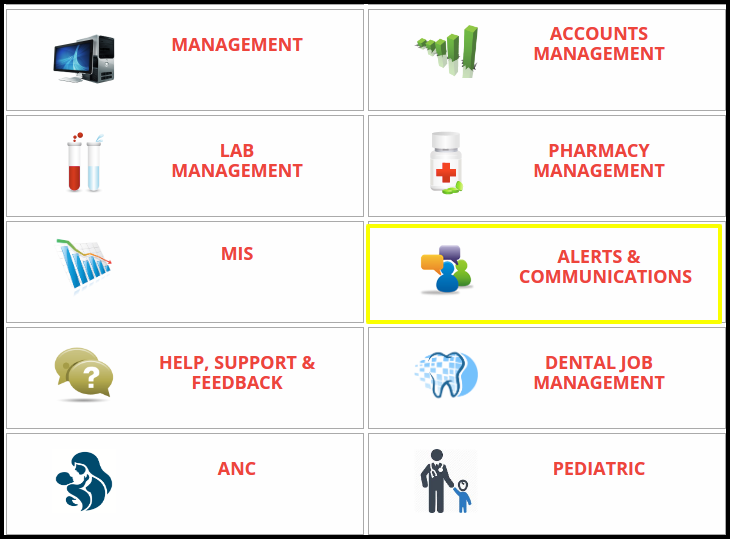
2. Once you click on the module, the alerts and communication management page will be open.

In the page having a two ways communication such as
- Alerts :- Alerts messages is require for patient to informing them about treatment schedule alerts
- Messages :- in the message column having two types like read and unread messages.
3. Click on the Alerts option,The manage alerts page will be open.
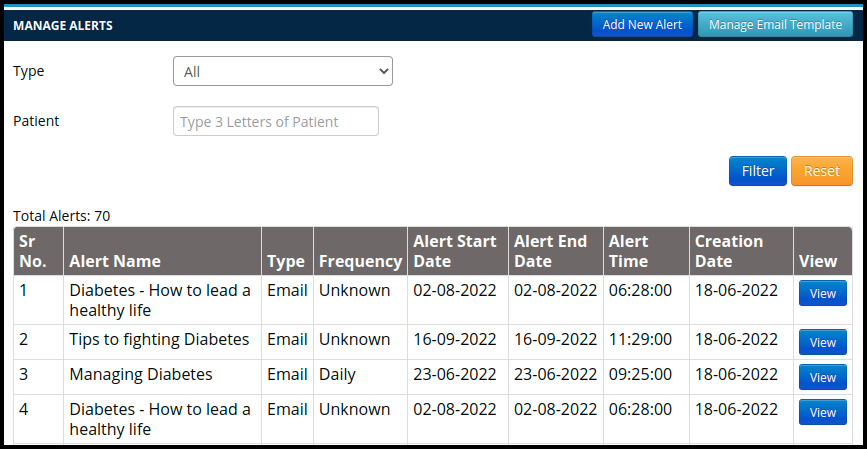
In the alerts following points are include such as
- Serial Number :-Includes the Alert count in the serial number
- Alerts Name :- includes the alerts and title of the notification
- Type :- in the types includes the alerts types such as SMS, Email, Display
- Frequency :- in the Frequency includes the types of frequency to sending alerts
- Alert Start & End Date :- In the alerts includes the start and end date to activate and deactivate their alerts
- Alert Time :- In the alerts, 5time should be require to sending a right message at right time
- Creation Date :- creation date should be required to identify the message creation date
- View :- in the view option users can check the alerts status
- Filter :- in the alerts users can find the messages by using the two thing such as types of alerts and patient name
- Add New alerts :-

In the messages following points are include such as
a. Read Message :- in the read column users can check the read messages
b. Unread Message :- in the unread column users can check the unread messages
4.In the manage alert page users can create new alerts as well as Messages which is given below.
Image 1.
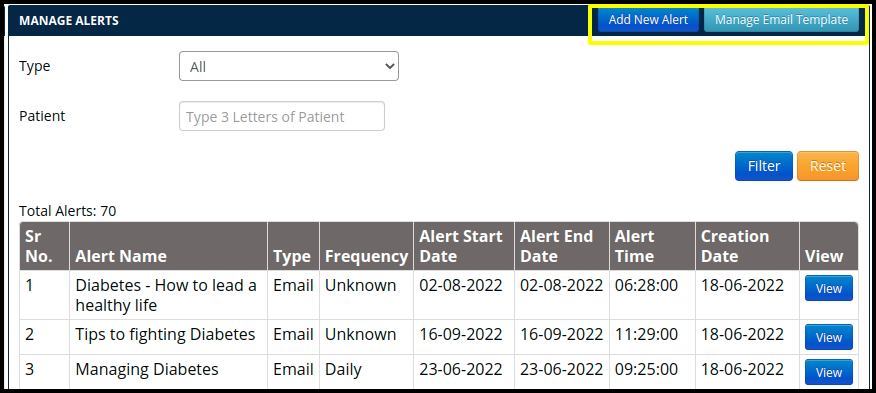
A. To create new alerts, click on the “Add New Alert Button”
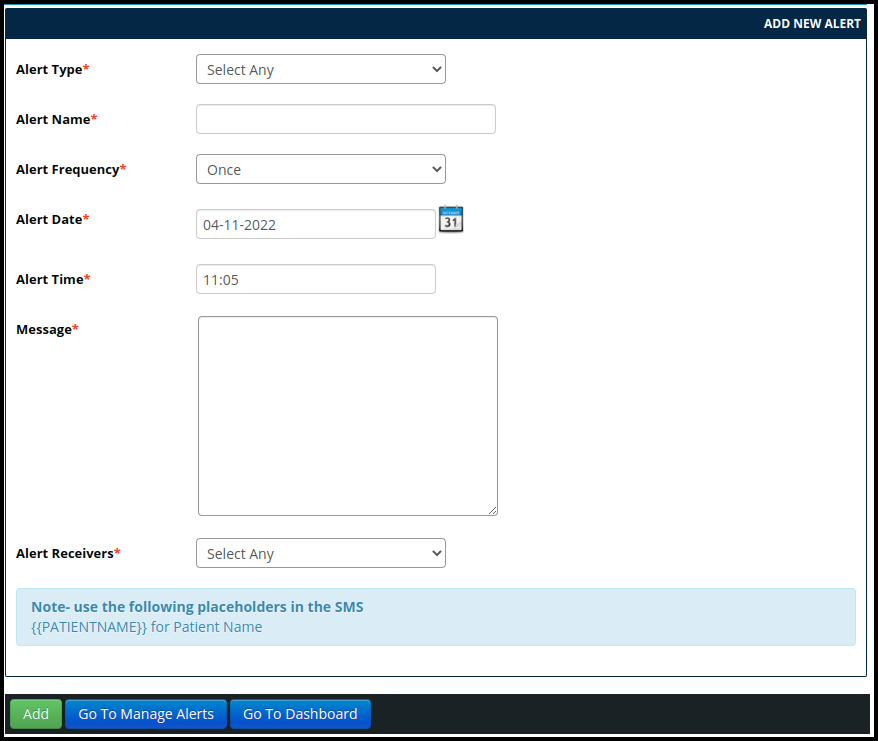
- In the alerts having a so many points such as
- Alert Type includes the type of alerts like SMS, Email and Display
- Alert Name includes the name of the alerts and messages
- Alert Frequency includes the types of frequency like Once, Daily Monthly and yearly
- Alert Date & time includes the start date and time of the messages
- Message box include the description of the messages and alerts.
- Alert Receivers includes the following alerts receivers such as
a. Staff includes the staff members
b. Patient include the specific patient
c. Patient Tag
d. All users includes the staff members as well as all users
e. All Patient includes the all types of patient
Image 2.
f. Communication group can assign the alerts to receivers.
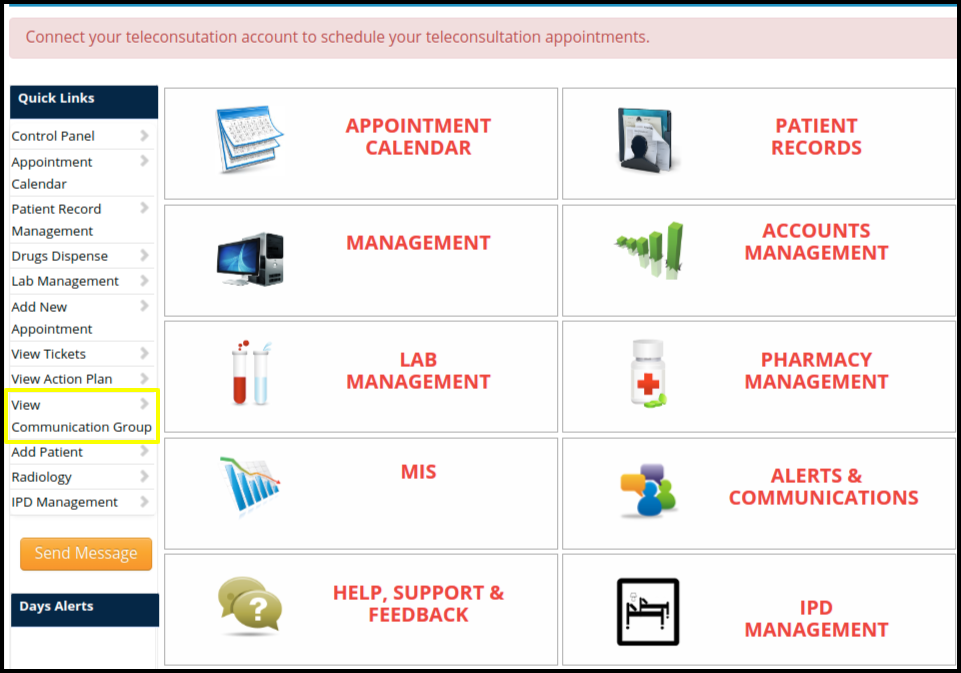
5. To create the communication group, click on the View communication group which is displayed in the quick link
A. Once you click on the communication group the Communication group screen will be displayed
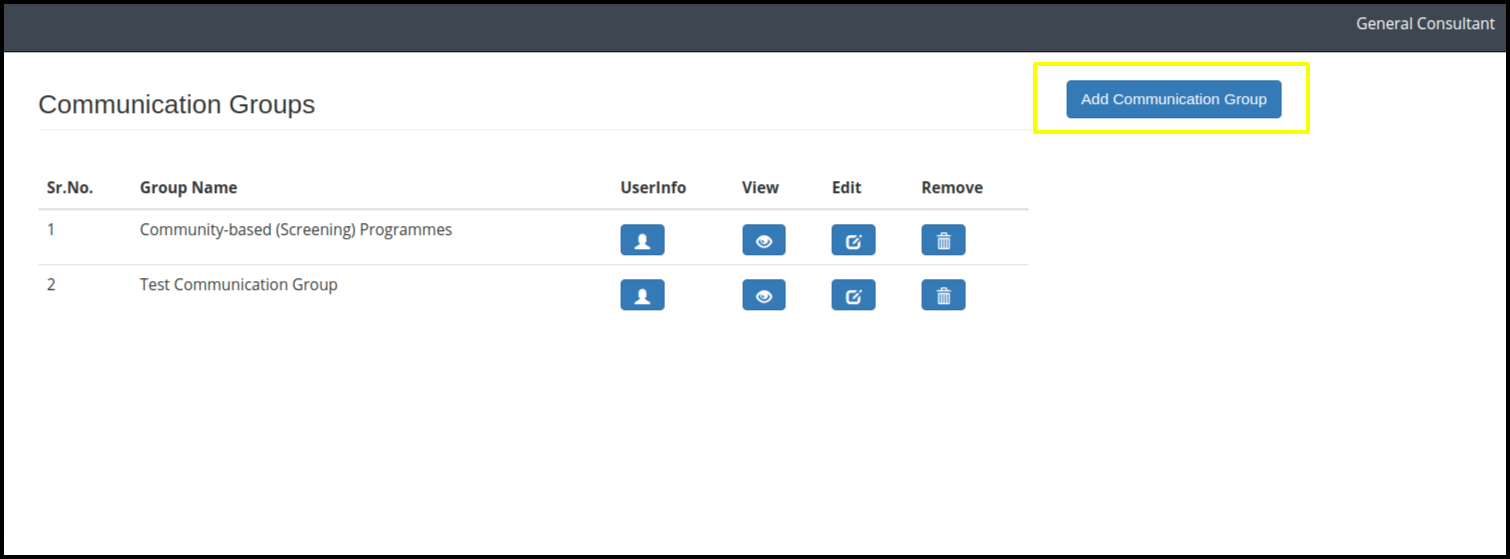
B. To create a communication group, click on the Add Communication Group Button
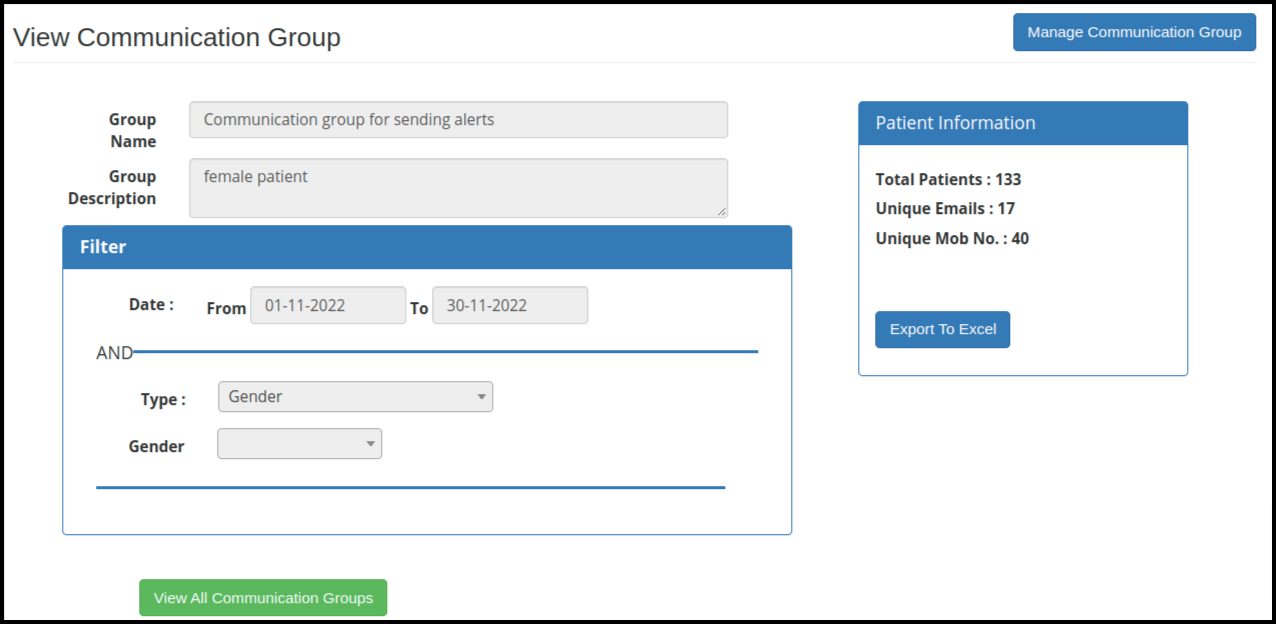
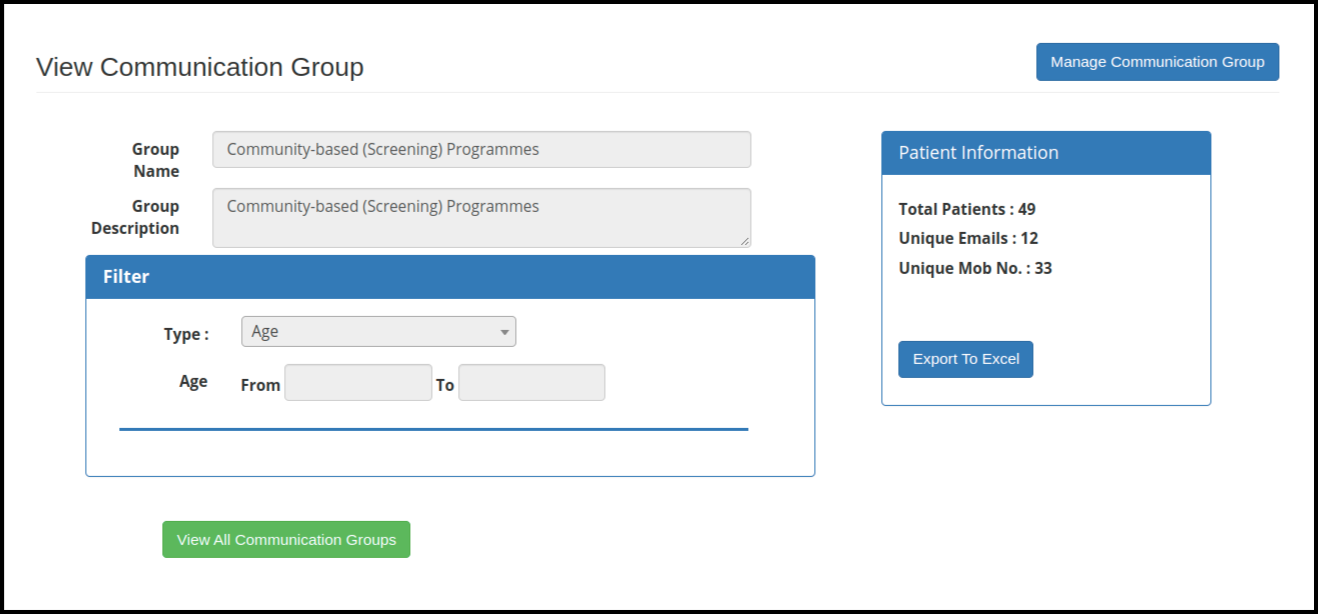 Add communication group you can add the following points such as
- Group Name :- Name should be required to identify the group name
- Group description :- Description should be required to specified the group motive
- Filter :- In the Filter column you can apply the date wise filter to verify the group members as well as select the category to check the total patient and their unique email with contact number to sending a alerts
- Patient information includes the following points such as
a. Total patient :- here users can count the total patient in the particular group to sending a alerts
b. Unique Email :- Here users can find the count of the unique emails of the patient to sending alerts with Emails
c. Unique Mobile number :- Here users can find the count of the contact number to sending a SMS alerts - Once you fill up all the details, click on the “save communication group” button to save the group
- While create the group you can assign the filter category in which include the category such as
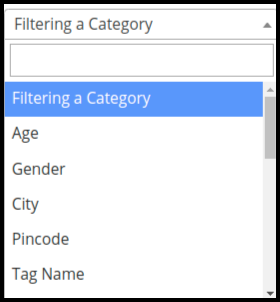
a. Age
b. Gender
c. City
d. Pincode
e. Tag Name
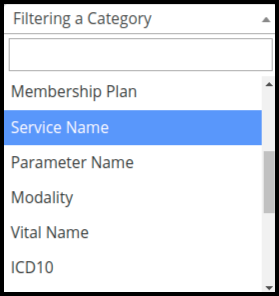
f. Membership Plan
g. Service Name
h. Parameter Name
I. Modality
j. Vital Name
k. ICD10
l. If you click on “apply filter between date “ check box, then here users can assign specific date to particular group members or patient

- Once you click on the save button the communication screen will be display

- In the highlighted part you can check the created group
- To view the created group, click on the Edit option which is displayed in the above image
- In the Alers page you can assign the specific communication group to sending alerts via email or SMS.
- Here you can assign the Email or SMS alerts to specific group which is shown in below image
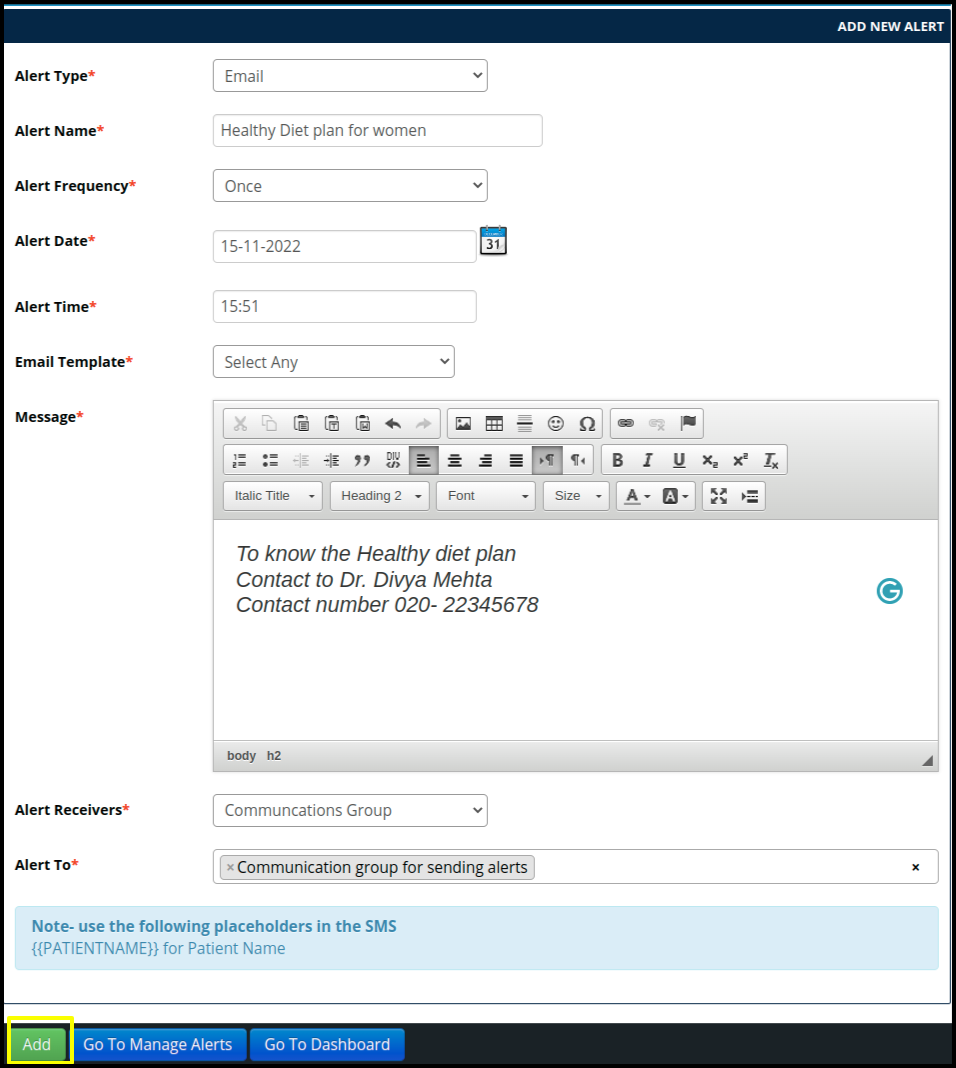
C. Once you fill up the following data, click on the “Add “ button to create the alert messages
D. To create an email template, click on the manage email template button.
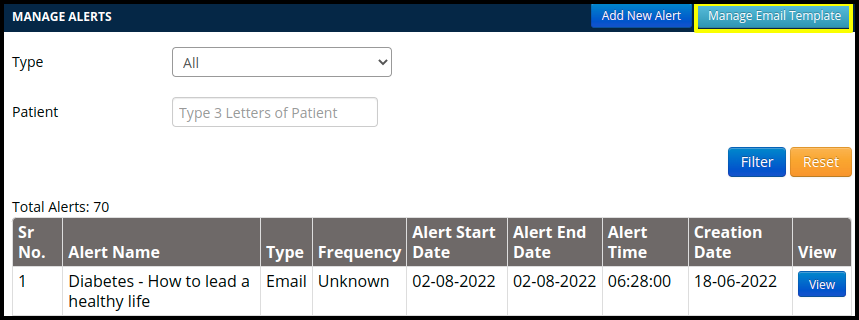
E. Once you click on the template button the mange email template screen will be open.

In the Template manager includes the three thing such as
- View the template :- in the view option users can check the created template data

- Edit the template :- In the Edit option users can modify the created template data
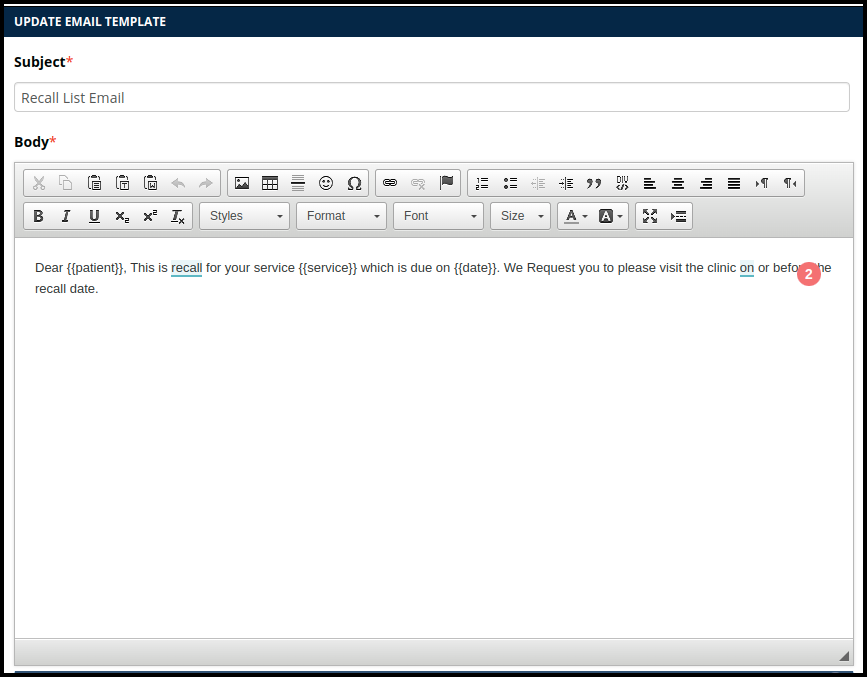
- Create the new template :- In the created new template users can create the new template to assign for the email alerts.
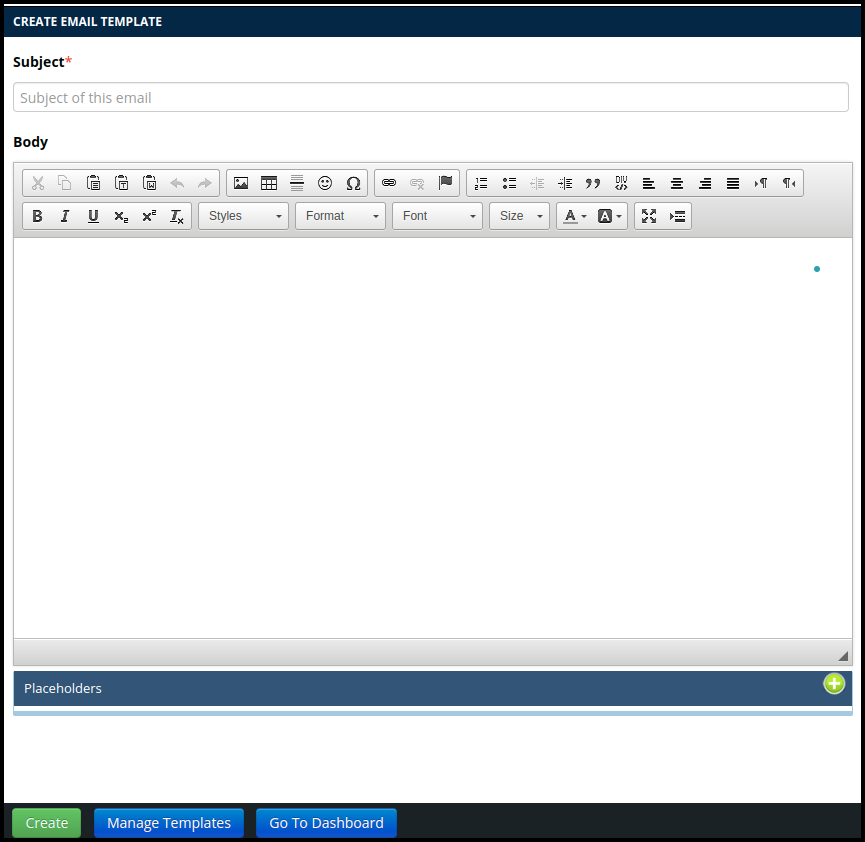
While creating a new email template here having a two tab such as
- Subject :- In the subject users can put a name of the email template
- Body :- In the Body users can put the description of the email subject
- Once the fill up all data in the two tab, then click on the create button to create the email template.