This article will guide you to dispatch the report.
1. Once you finalize the consultation the appointment it is successfully displayed in the appointment calendar.

2. Click on the lab management module to check the dispatched report.
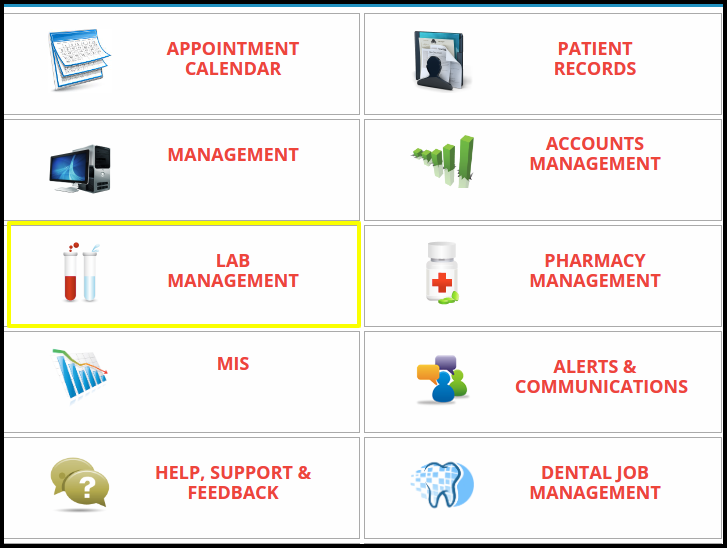
3. To dispatch the report users need to follow the first four process that is
A. Collection of Sample
B. Accept the sample
C. View the pending test
D. Lab verification
A. Collection of the sample includes the following points to process the collection such as

- Click on the sample management to collect the sample of the test
- Collect the sample by click on the” collect”option
- The medixcel sample collection screen will be open to collect the sample

- Here users need to click on the generate new barcodes
- Then fill up the date and time and place
- Then click on the collect check box and put remark in the collection remark option.
- Then click on the save sample barcode and collect the sample
B. Accept the sample includes the following points to process the accession such as
- Here users need to click on the collect option
- Then accession button will be open

- Once you click on the accession button, then medixcel-sample accession page will be open.
- Here users need to click on the accession checkbox and select the accept sample or reject sample
C. View the sample test :- To check the pending test, click on the pending test on the lab management module
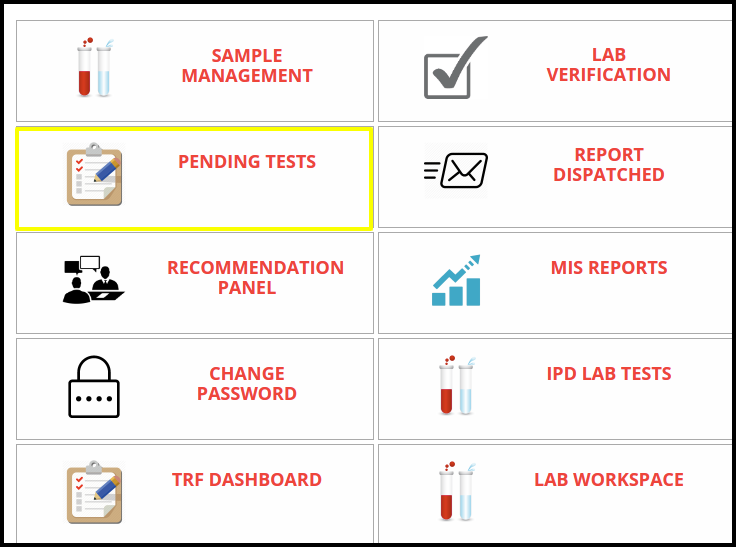
- Once you click on the pending test the pending test screen will be open

- Click on the view option to check the sample details and remarks.
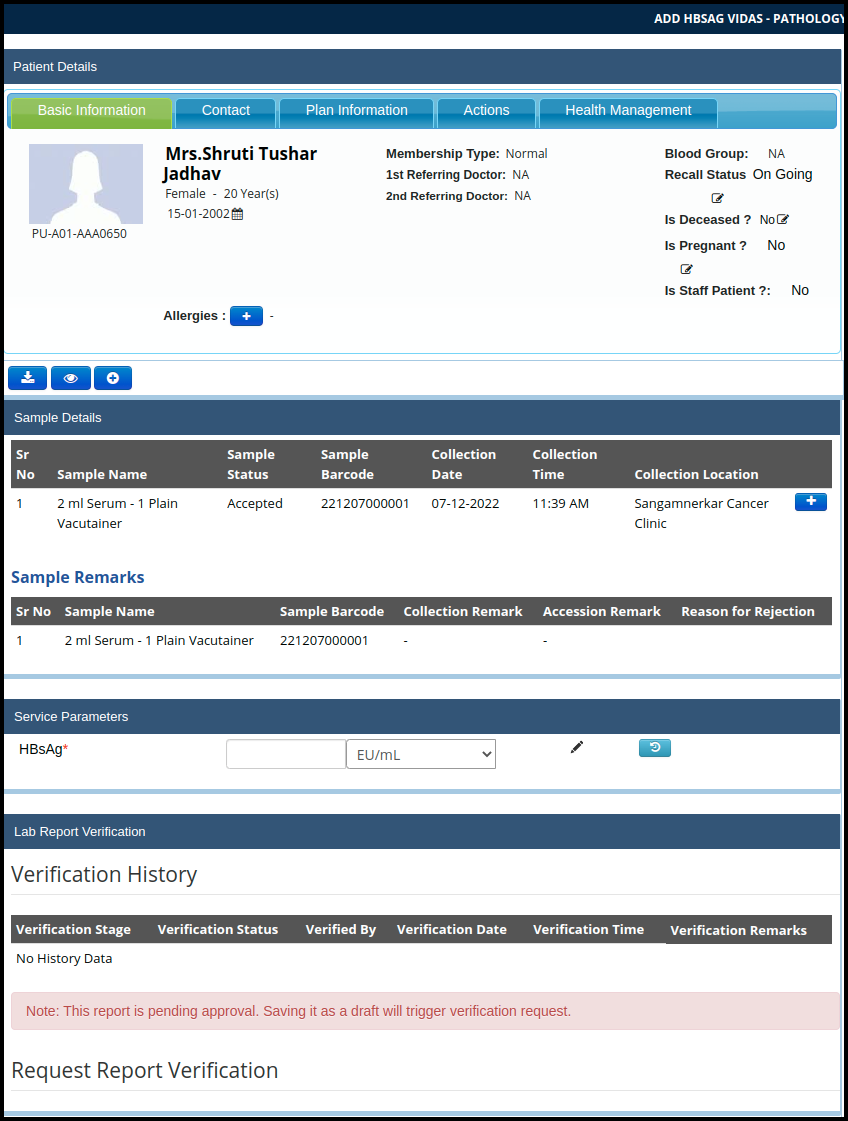
- In that include the Sample details, Sample Remark, Service parameter, Verification history
- Here users need to check the sample details, Sample remark
- Then update the parameter in the service parameter coloum.

- Then click on the save draft to save the parameters.

- Here users can check the pending test and view the test and then save the test in draft for verification purpose.
D. The Level of verification :- in the level of verification includes the following point such as
- Once the parameter saves in the doctor consultation, then two level verification required for doing the final process for dispatching the report
- Level 1 verification
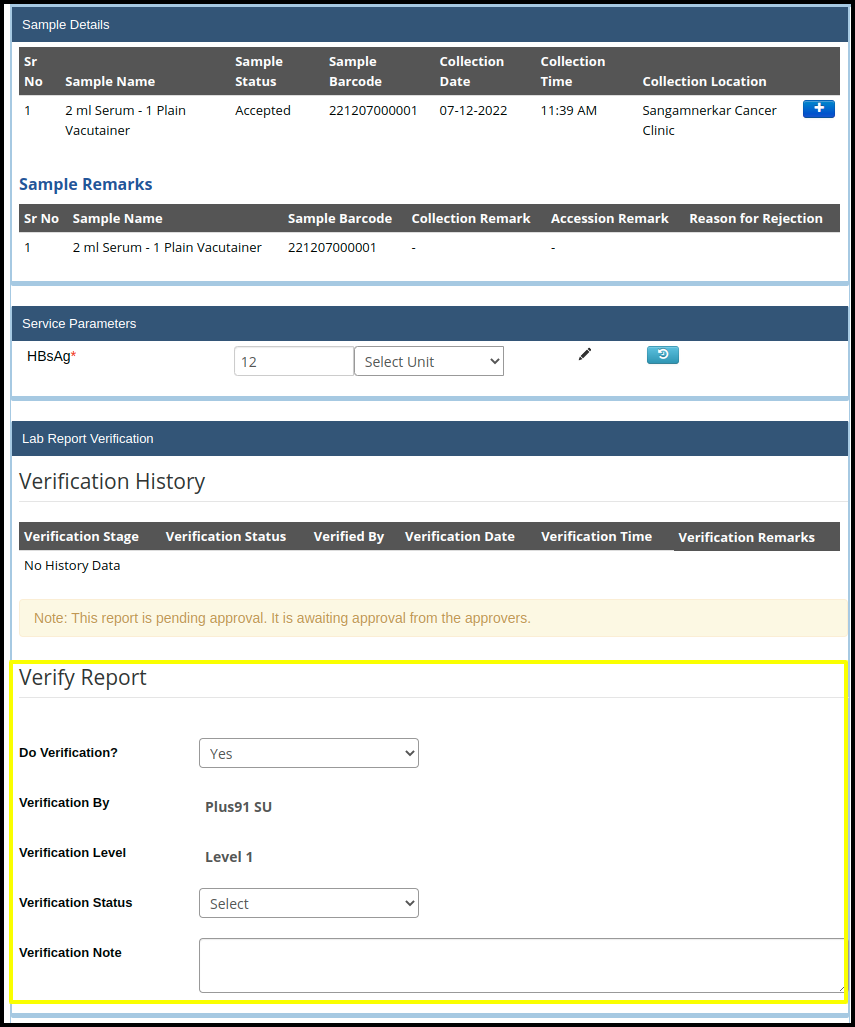
- Highlighted box includes the level one verification in which fill up the following point
a. Do verification include the two points, yes or no
b. Verification by includes the name of the person who accept the level 1 verification
c. Verification level:- Here define the level 1 and level 2 verification
d. Verification Status :- include the two status verification that is accepted and rejected
e. Verification Note :- In the note doctors can put important message while updating the note
f. Click on the save draft to save the first level of verification - Level 2 Verification
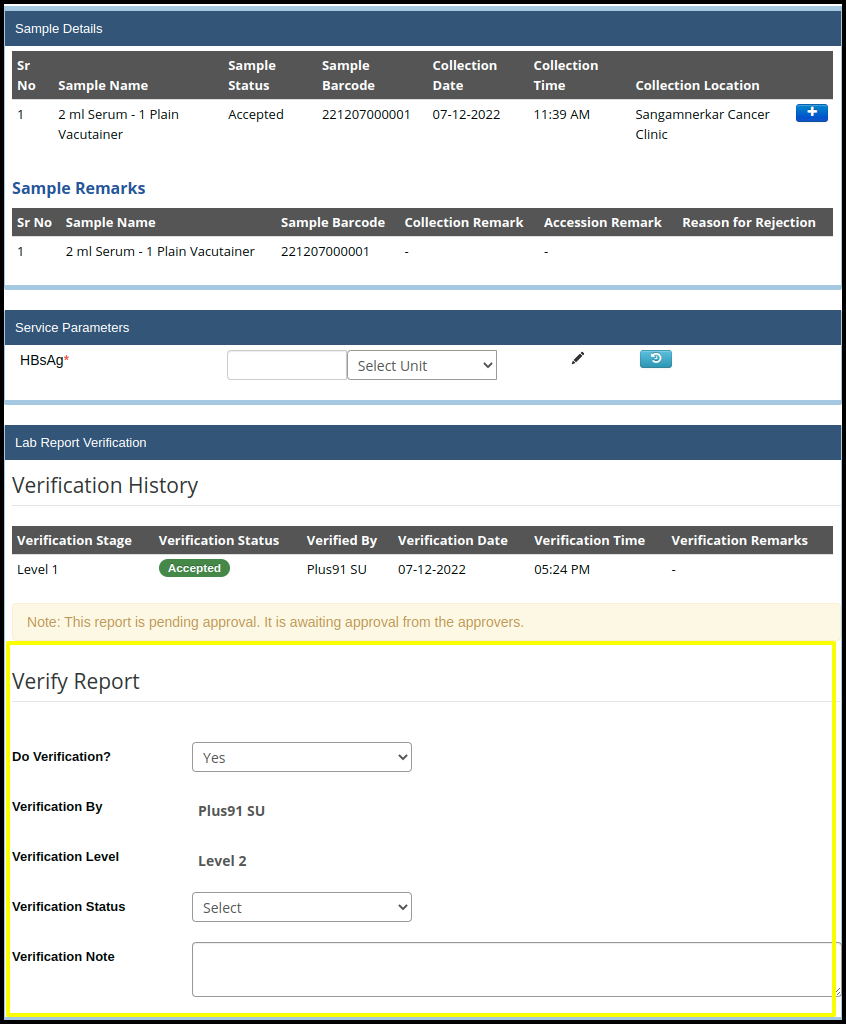
- Highlighted box includes the level two verification in which fill up the following point
a. Do verification include the two points, yes or no
b. Verification by includes the name of the person who accept the level 2 verification
c. Verification level:- Here define the level 1 and level 2 verification
d. Verification Status :- include the two status verification that is accepted and rejected
e. Verification Note :- In the note doctors can put important message while updating the note
f. Once the level one verification done, then in the lab report verification getting a history of level 1 verification in which includes the
I. Verification Stage :- Show the verification stage
II. Verification status :- shows the status of the verification
III. Verified by :- here show the person’s name who verifies the level
IV. Verification date & time :- date and time will be reflected according to the verification
V. Verification Remark:- if doctors or lab technicians put notes in the note option while doing a 1st level verification, then this will be reflected in the verification history.
4. To check the dispatched report, click on the report dispatched button in the lab management module
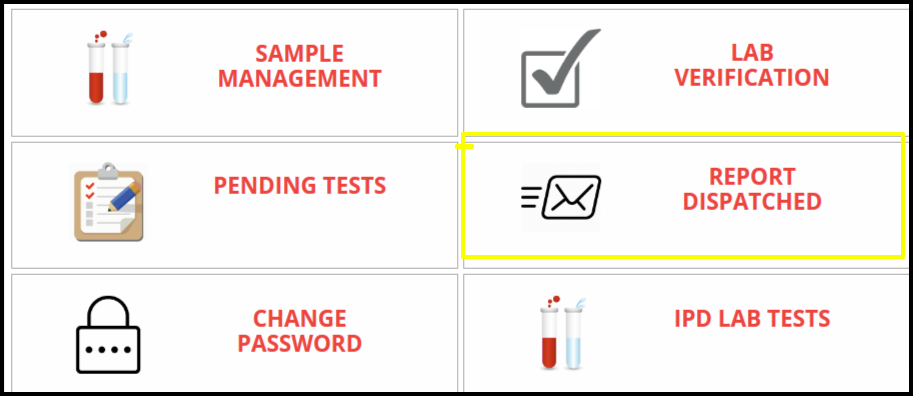
A. Once click on the dispatched report, the report dispatched page will be open
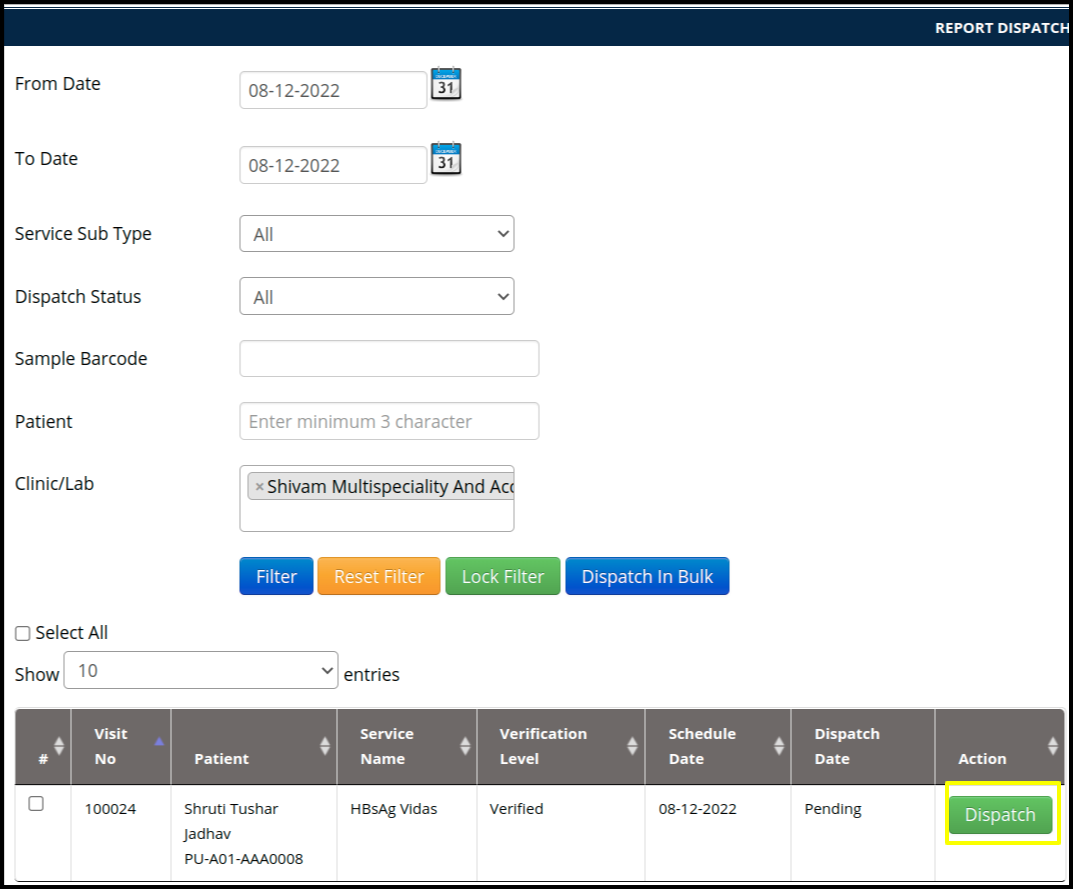
B. Click on the Dispatch button
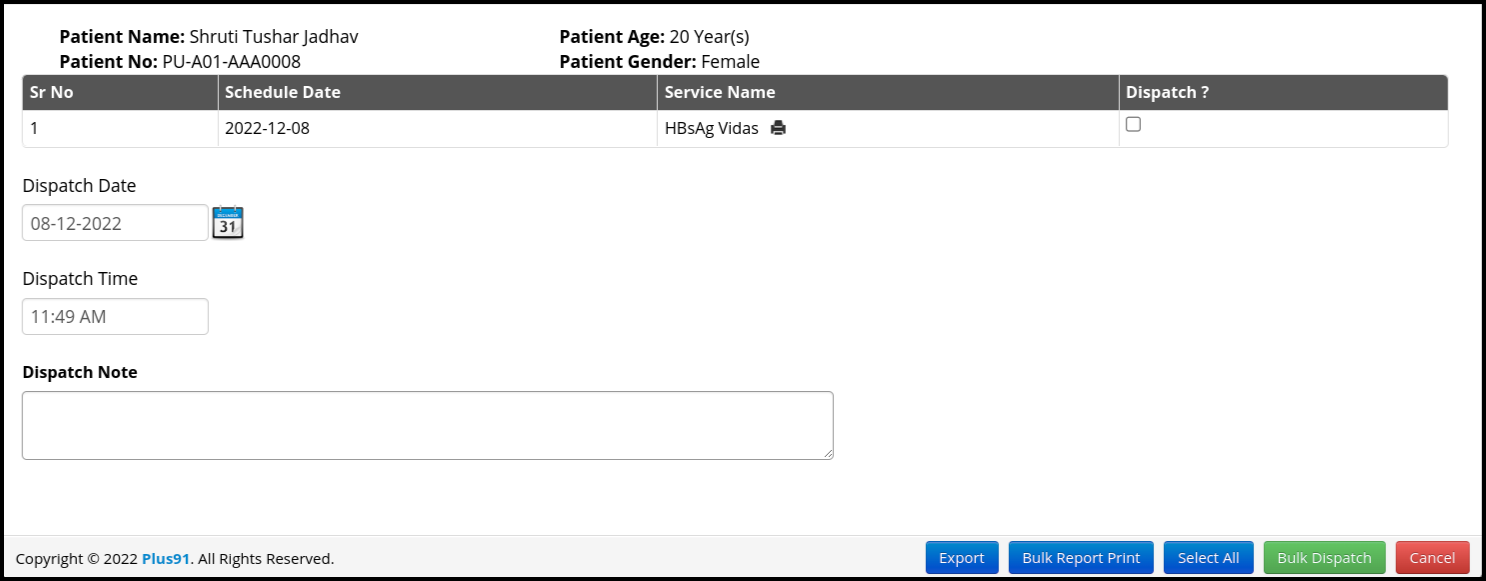
In the bulk-dispatched screen will be includes the following point such as
- Patient information :- Patient information should be required to identify the patient report according to the following points
a. Patient name
b. Patient Age
c. Patient Number
d. Patient Gender - In the second part include the following points such as
a. Serial Number :- Serial number should be required to count the dispatch report
b. Schedule Date :- Schedule date specifies the test date when the test is done.
c. Service Name:- Service name should be required for a final result
d. Dispatch Check box :- Dispatch checkbox should be required for final confirmation to dispatch the report
e. Dispatch Date :-Monitoring and tracking reports dispatched on a day to day basis
f. Dispatch Time :- In laboratory management, this cycle encloses the time from ordering a test to delivering reports to end customers
g. Dispatch Note :- Dispatch note allows hospitals to access their delivery and It also delivers valuable information to the hospital laboratory. - In the third part includes the buttons such as
a. Export :- Once users click on the export option, then they will get the final report in the PDF file
b. Bulk Report Print :- once you click on the bulk report print, then the Medixcel Bulk report screen will be open to generate the final bill
c. Select All :- here users can select all check box immediately
d. Bulk Dispatch :- Here user can dispatch the report bulkley
e. Cancel :- Here user can cancel the dispatched process.