• Home
  • Categories
    • Appointments and schedule
    • Lead management
    • OPD
    • IPD
    • ANC
    • Management
    • Accounts Management
  • Contact Us
  • Support
  • Home
  • Categories
    • Appointments and schedule
    • Lead management
    • OPD
    • IPD
    • ANC
    • Management
    • Accounts Management
  • Contact Us
  • Support
home/Knowledge Base/CPH/Dashboard/Manage Report setting

Manage Report setting

18 views 0

Written by plus91
October 3, 2023

This article will guide on how to add header on top of the bill’s receipt and report.

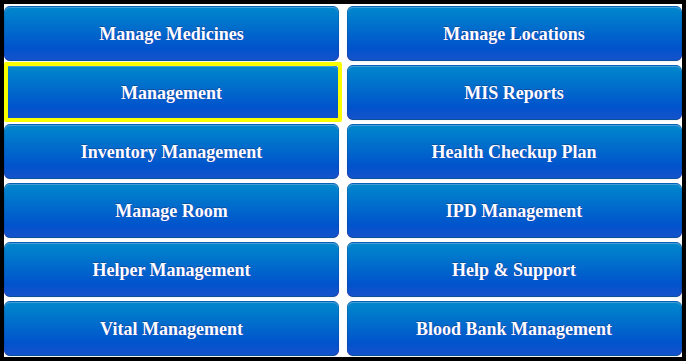
1. Click to Management on the CPH dashboard.

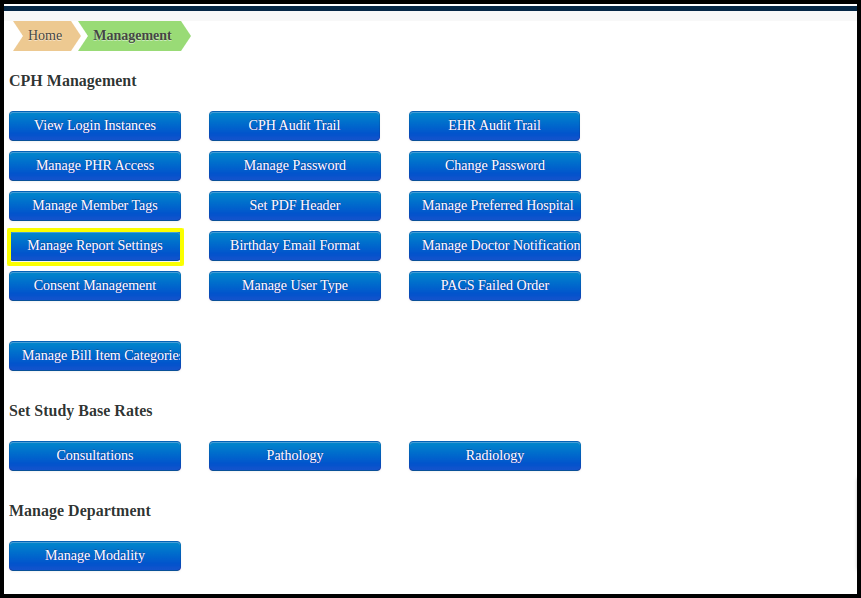
2. Click to Manage report setting from the CPH management.

3.The process for attaching the hospital header picture at the top of the bills, receipts, and health report is shown here.

A. Set Report Configurations


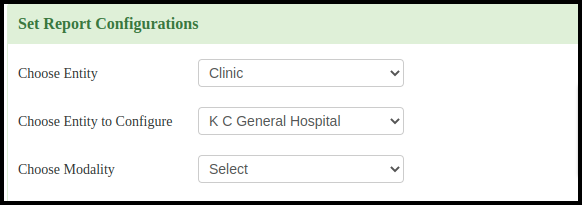
a. Choose entity : Where we must select the entity to apply the billing and report heading.
b. Choose Entity To Configure :- Select the clicnic name where we need to apply the header
c. Choose Modality: Select the modality from the drop down list and apply the header for that modality only. 

B. Member Header

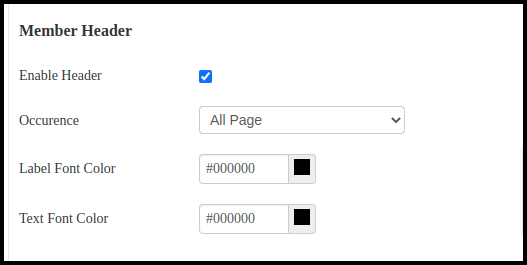
a. Enable Header: Select the Enable header button
b. Occurence: Select the pages where we need to apply the header
c. Lable Font color : Select the color code for lable
d. Text font color: Select the color code for text

C. Report Configurations

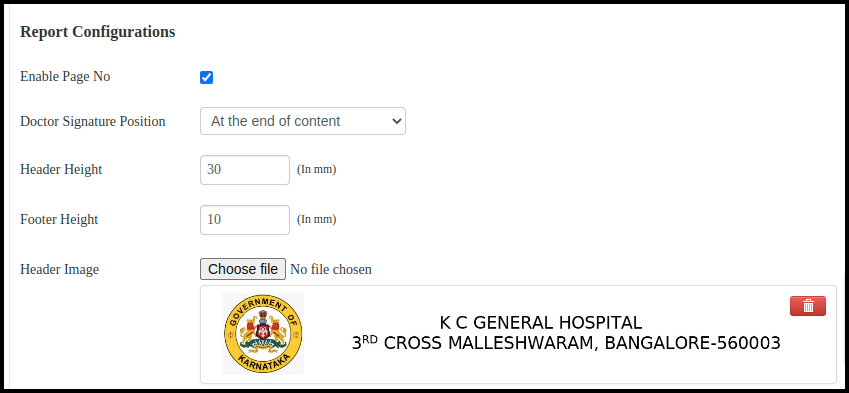
a. Enable Page No: Select the checkbox for enable the specific or all pages.
b. Doctor Signature Position: Apply on either end of the pages or end of the content.
c. Header height : Put the Header Height in mm
d. Footer height: Put the footer height in mm
e. Header Images: Choose the file from the browse and click to upload.

D. Pathology

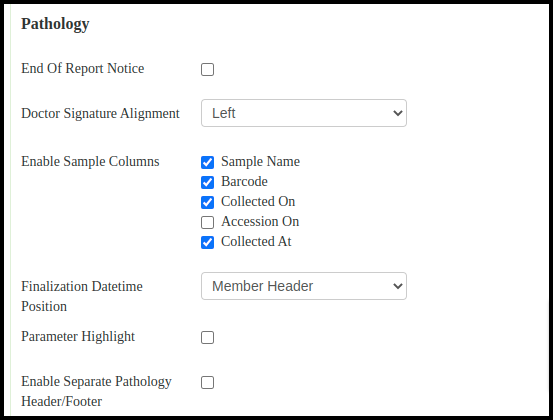
a. End of the Report Notice : Select the checkbox that is end of the report notice.
b. Doctor Signature Alignment: Select the doctor signature alignment from the drop down list.
c. Enable Sample Columns: Select sample Name, barcode, Collect on, Accession On, Collected At
d. Finalization Datetime Position : Select the position of date and time
e. Parameter Highlight: Select the check box if required
f. Enable Seprate Pathology header/footer: Select the checkbox if required

E. Barcode


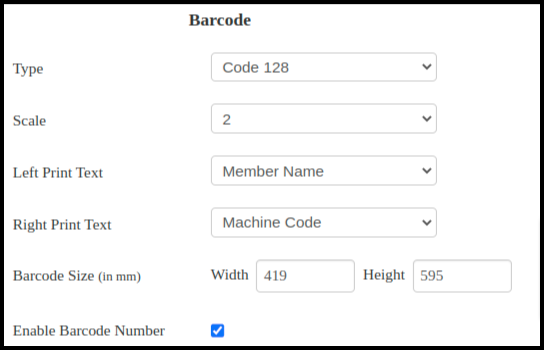
a. Type: Select the type of code
b. Scale: Select the specific code
c. Left Print Text : Choose any print text from the drop down list
d. Right Print Text Choose any print text from the drop down list
e. Barcode Size in mm : Choose barcode size in width and height
f. Enble Barcode Number : Select the check box

F. Patient Token Report Configurations

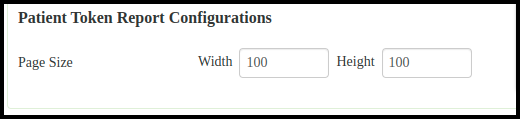
a. Page Size : Here select the width and height

G. Click to “Save settings” button to save the overall settings

Tags:Mange Report SettingManagmentCPH managementheader setting

Was this helpful?

Yes  No
Related Articles
  • Manage Helper Fields
  • Manage Medical Group
  • Manage Helpers
  • Manage Helper Field Calculation
  • Import/Export Helpers
  • Manage Vital Mapping
Leave A Comment Cancel reply

Popular Articles
  • Create A Purchase Store
  • OPD Other Study Bill Report
  • Manage Helper Fields
  • Manage Password
  • Export All Leads
KB Category
  • Quick Links
  • Master Management
  • Inventory Management
  • Admit process
  • Scan & Share
  • Milestone 3
  • Milestone 2
  • Waste Management
  • Day Observation / Detention
  • Biomedical Waste Management
  • Dashboard
  • Accident & Emergency Ward Management
  • Milestone 1
  • ABDM
  • Blood Transfusion Request
  • Transfusion Medicine Unit
  • Operation Theatre Calendar
  • Listing
  • Appointment view
  • Listing
  • Pediatric
  • Appointment View
  • Mortuary Management
  • Management
  • Linen & Laundry
  • Request Blood Product
  • Blood Lab Service
  • Lab Service
  • Taxation Management
  • IPD From CPH
  • Recommendation Panel
  • Mortuary Reports
  • Mortuary plan
  • Oncology
  • NABH KPI Dashboard
  • NABH Dashboard
  • Dashboard
  • CPH
  • Surgery Recommendation
  • Inventory Dashboard
  • Calendar View
  • Dialysis Management
  • A & E Ward
  • OPD Reports Management
  • IPD Reports
  • OPD Reports
  • Others Bill Report
  • Accounts management
  • Management
  • ANC
  • Reports Management
  • Lead Status
  • Lead Management
  • Help and Support Management
  • Blood Bank Report
  • Appointment View
  • Dental Managment
  • Patient Record
  • Reports Managment
  • Schedule Status
  • Filters
  • Calender view
  • LIS
  • IPD
  • OPD
  • Pharmacy
  • IPD Patient Records
  • IPD Registered
  • IPD Bill reports
  • Station
  • Medicine PO
  • MIS Report
  • MIS
  • Medicine Report
  • Medicine Dispense
  • IPD Admission Process
  • Appointments and Scheduling
  • values and parameters
  • Consultation account
  • Master management
  • Ward status
  • Schedule Manager
  • Print report
  • Lab Process
  • Lab MIS Report
  • Pharmacy Reports

  Manage Member Tag

Manage Virtual bed Accessibility  

plus91_logo
MediXcel is a flexible software solution for clinics, out-patient departments inside hospitals and clinic chains. It manages Medical Data of the patients and Administrative data of the practice. Its design lets user store data with ease, quickly retrieve data and use this data in various combinations and formats to make better decisions on patient treatment, customer service and practice profitability.
Company
  • Careers
  • Mission/Vision
Support
  • Knowledge Base
  • Video Manuals

[google-translator]

  • Policies
  • Certificates
  • © Plus91 Technologies All Rights Reserved