
This article will guide you on how to generate the print email report . To view, adding an appointment for a new patient click here.
1. Once you save the appointment it is successfully displayed in the appointment calendar.

2. Select the service name from the appointment to generate the history report.

3. Once you click on the service, the doctor consultation page will be open.
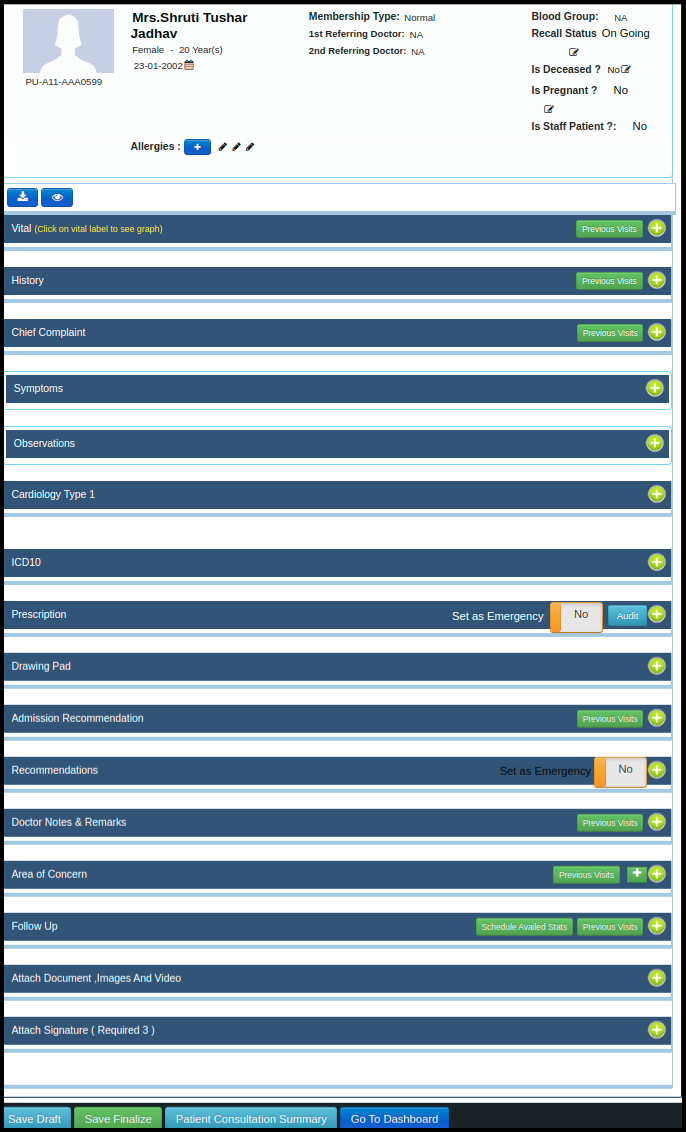
4. To generate the report generation history, fill up all the helpers which are in the doctors consultation page
In the doctors consultation page having a so many helpers such as
A. Vitals :- Vitals give us a glimpse into our overall well-being. They signal early signs of an infection, prevent a misdiagnosis, detect symptom-less medical problems, and encourage us to make better choices.
B. History:- The history is a sharing of experience between patient and doctor. A consultation can allow a patient to unburden himself or herself.
C. Chief Complaints :- The chief complaint is a concise statement describing the symptom, problem, condition, diagnosis, physician-recommended return, or other reason for a medical encounter.
D. Symptoms :- A physical or mental problem that a person experiences that may indicate a disease or condition.
E. Observation :- Observation is a way of gathering data by watching behavior, events, or noting physical characteristics in their natural setting.
F. Cardiology Type 1:- Type 1 myocardial infarction occurs in those with atherosclerotic plaque rupture and thrombosis.
G. ICD 10 :- The ICD is important because it provides a common language for recording, reporting and monitoring diseases.
H. Prescription:- When used as prescribed by a doctor, prescription medicines can be helpful in treating many illnesses.
I. Drawing Pad :- The Graphic tablets use the human hand’s fluid motion and physical positioning to its most magnificent power.
J. Admission Recommendation :- If particular patient wants to shift the OPD patient to IPD then doctors can recommend into the admission recommendation
K. Recommendation :- If doctor suggest any test for patient then he will put the test in the recommendation panel
L. Doctor Notes & Remark :- Doctors can give short notes and remark about diseases
M. Area of Concern:- Most frequently, concerns regarded treatments, including medications, procedures, therapies, and adverse effects; diagnoses,
N. Follow up :- here follow up date should be required to take follow up of particular patient
O. Attached Document,Image and Video :- here doctor can attached the previous prescription or old disease related document
5. Once you update the consultation page, click on the Save finalized

6. Once you finalized the appointment, “Report Generation History”button will be open to generate the report
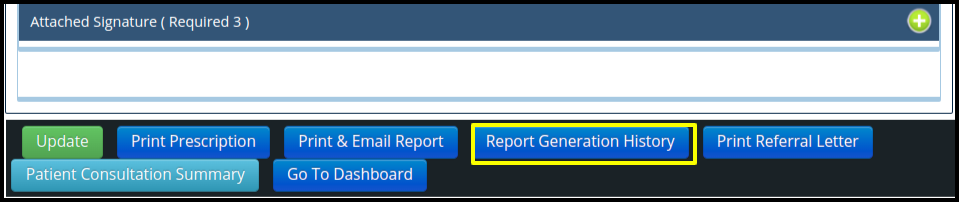
7.Once you click on the “Report Generation History ” button the Print Report details screen will be displayed,

A. Here having three thing where users can check the history of the generating the report such as
- Date & Time ;-Users can identify the count of the same report using the date-wise in the date and time
- Generate By :- Display the name of the person who really generates the reports in the Generate by option.
- Action :-Users can see how frequently they have performed an activity in a report by looking at the action.
B. In same screen having one more option that is Print new report.
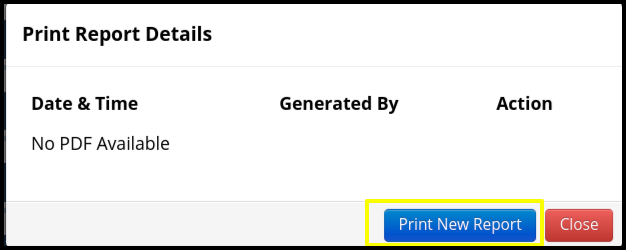
C. Once you click on the print new report the following point will be displayed such as
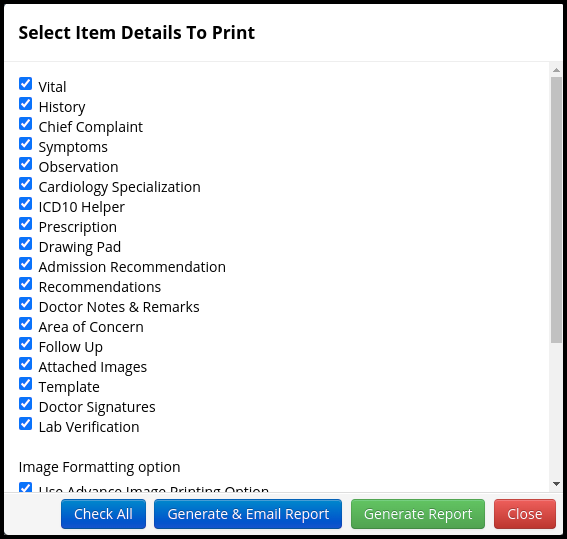
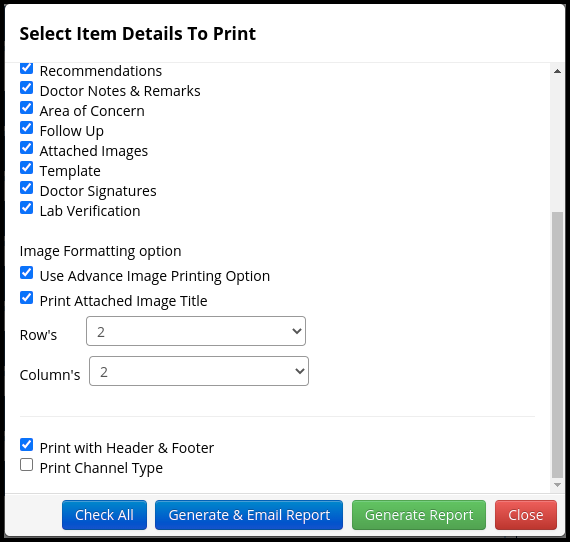
1. In the first part includes the helpers where users can mark in the checkbox and select only those items to generate the report
- Vital
- History
- Chief Complaint
- Symptoms
- Observation
- Cardiology Specialization
- ICD10 Helper
- Prescription
- Drawing Pad
- Admission Recommendation
- Recommendations
- Doctor Notes & Remarks
- Area of Concern
- Follow Up
- Attached Images
- Template
- Doctor Signatures
- Lab Verification
2. In the Image Formatting option includes the four point such as
- Use Advance Image Printing Option
- Print Attached Image Title
- Row’s
- Column’s
3. In the third part includes the following point such as
- Print with Header & Footer :- Here users can select the header and the footer checkbox to print on the report
- Print Channel Type :- If channel types available in the hospital, then users can select the print channel type option to generate the channel type name in the reports
4. In the Fourth part includes the following points to generate the report such as
- Check All :- In the “check all” option users can check all the check box weather it is select properly or not
- Generate & Email Report :- In the Generate & Email report following screen will be pop-up which is given below
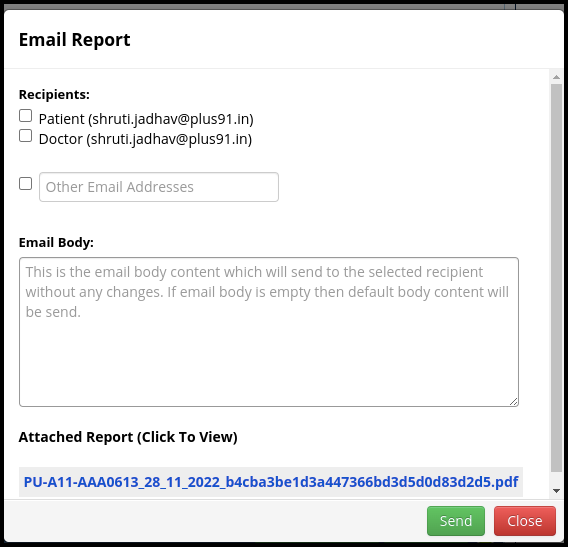
- In the Screen users can check the following point such as
a. In the recipients: section users can email the report to the patient as well as Doctors or any other person if selected the certain checkbox such as
I. Patient
II. Doctor
III. Other Email address
b. In the email body users can write an important message to send a report
c. In the attached report by default report will be attached in the PDF format
d. Once you have fulfilled all the parameter in the screen, then click on the send option to email the report - Generate Report
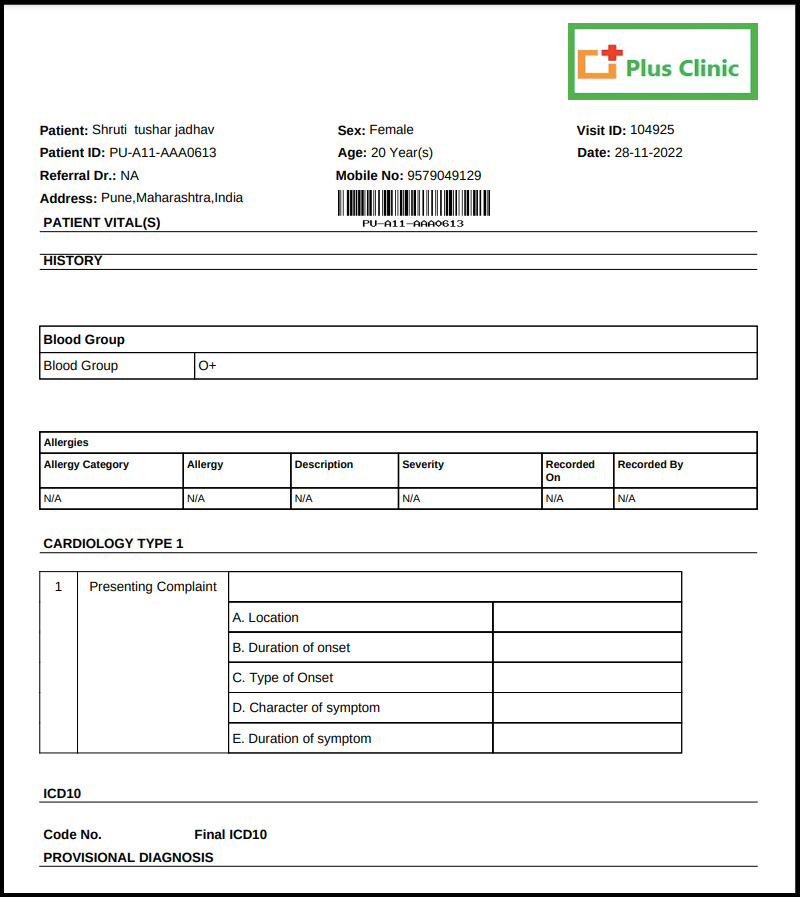
- In the Generated report includes the following points such as
a. In the first part includes the patient information such as
I. Patient name
II. Patient ID
III. Referral Doctors
IV. Address
V. Sex
VI. Age
VII. Visit ID
VIII. Barcode and Patient Number
X. Date
b. In the second part includes the helpers such as
I. History
II. Blood group
III. Allergies
IV. Cardiology type 1.
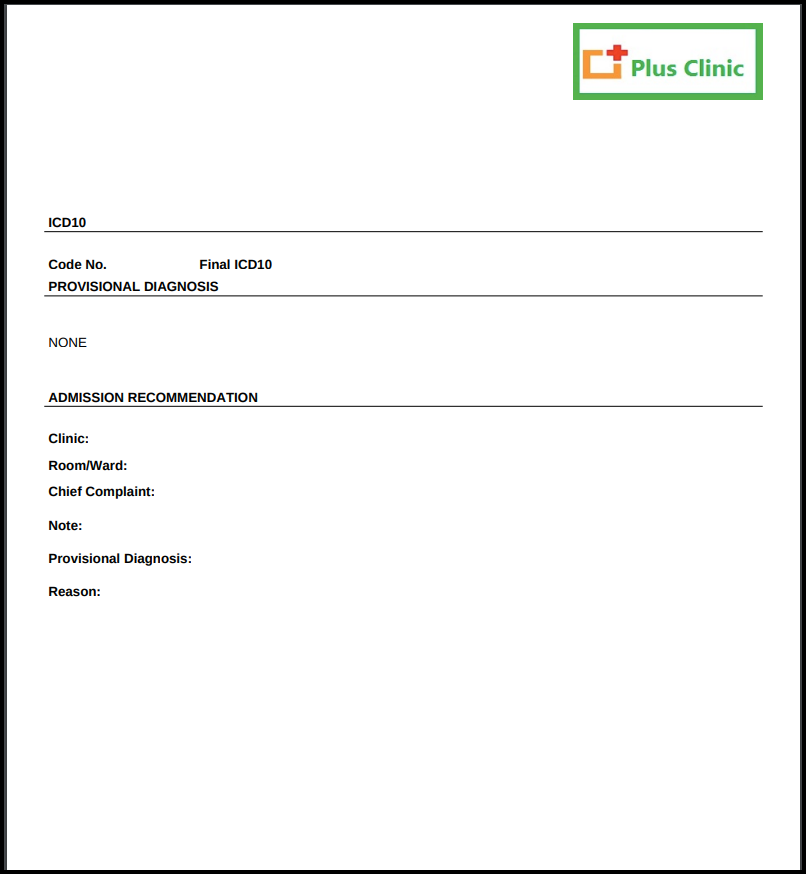
V. ICD 10
VI. Provisional Diagnosis
VII. Admission Recommendation
VIII. Patient Vitals
Close :- If the report is not required, then users can click on the close option.
- c. In the third part having a QR Code

- Use of QR Code :- Here patient can scan the QR Code and get the link to digital report on the mobile.