• Home
  • Categories
    • Appointments and schedule
    • Lead management
    • OPD
    • IPD
    • ANC
    • Management
    • Accounts Management
  • Contact Us
  • Support
  • Home
  • Categories
    • Appointments and schedule
    • Lead management
    • OPD
    • IPD
    • ANC
    • Management
    • Accounts Management
  • Contact Us
  • Support
home/Knowledge Base/OPD/Dental Managment/Article On Dental Management

Article On Dental Management

43 views 0

Written by plus91
December 1, 2022

This article will guide you on work of Denat Job Management. To view, and adding an appointment for a new patient click here.
1. Create one appointment for a dental consultation.

2. When we click on the study name consultation page will open.

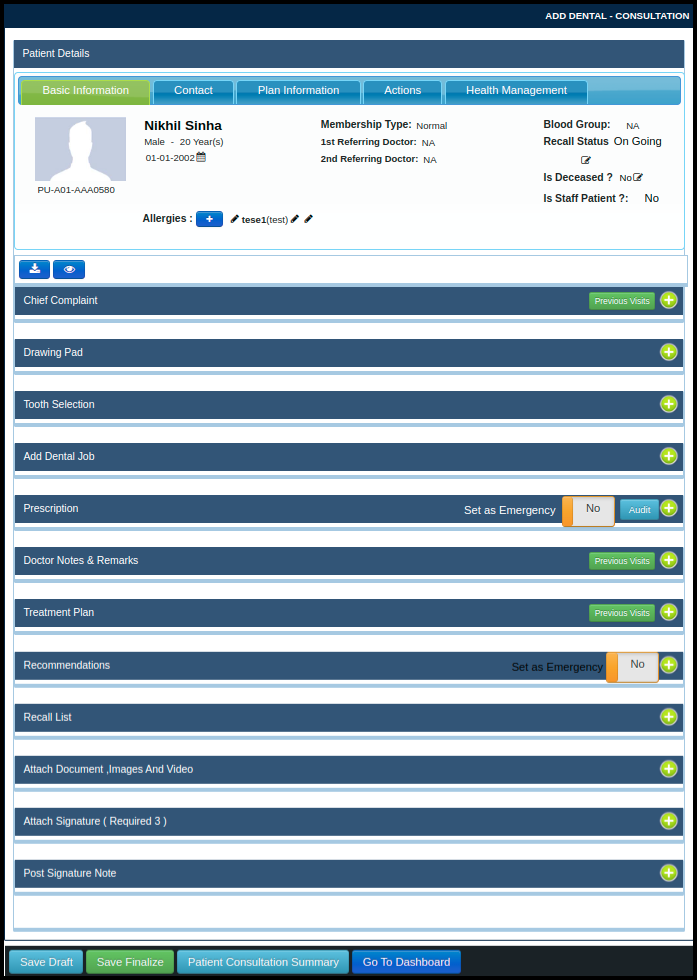
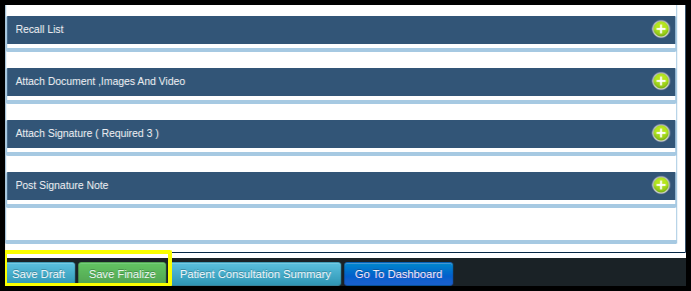
3. Fill data in the all required helper and save the consultation.

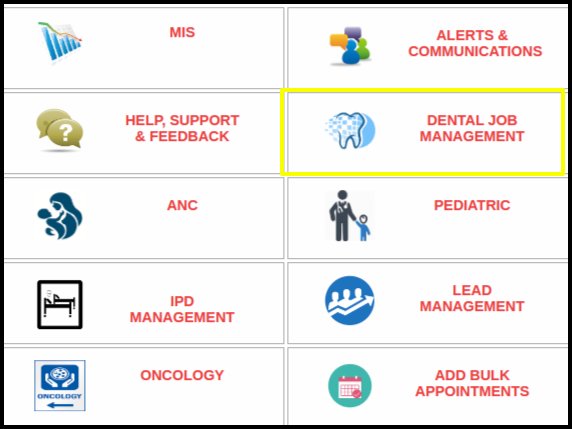
4. Then click on the control panel and search for the Dental Job Management module and click on it.

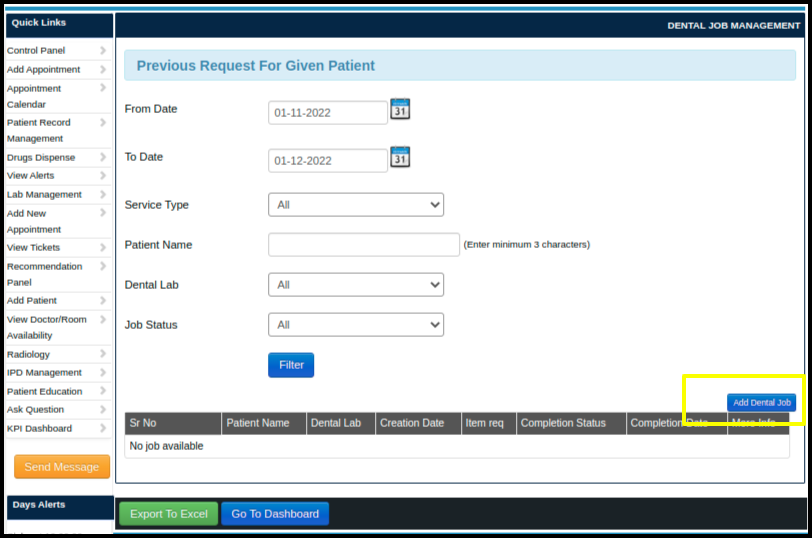
6. After Clicking on this module dental job management window will open.

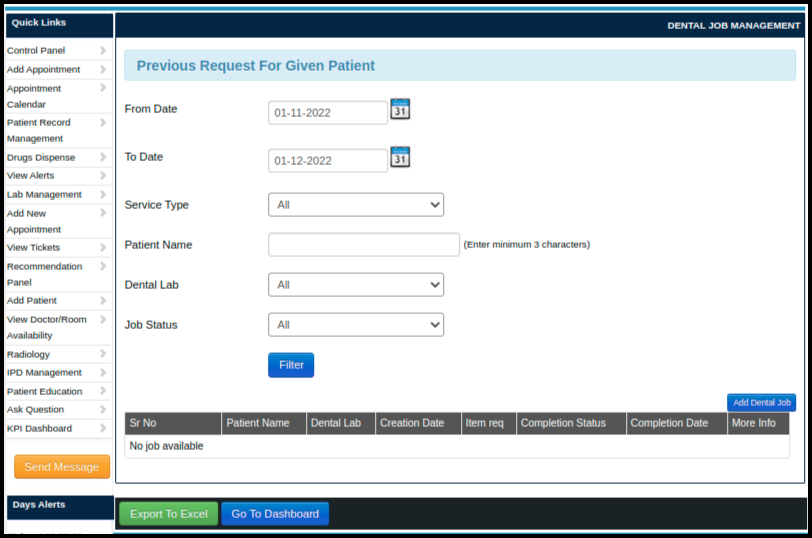
  • In the above window, we can see some fields such as-
    I. From Date- We can select a date range.
    II. To Date- We can select a date range.
    III. Service Type- For which service patient has come like there are drop-down list like Crown, Braces, Artificial Tooth and Removable Braces.
    IV. Patient Name- We can search patient name.
    V. Dental Lab- Name of the dental lab.
    VI. Job Status- Status of job work like new, assigned, cancelled and rescheduled.
  • At the bottom side of the page, there is one option Add Dental Job which is shown below.

  • When we click on the Add button we can see the following window which is shown below.

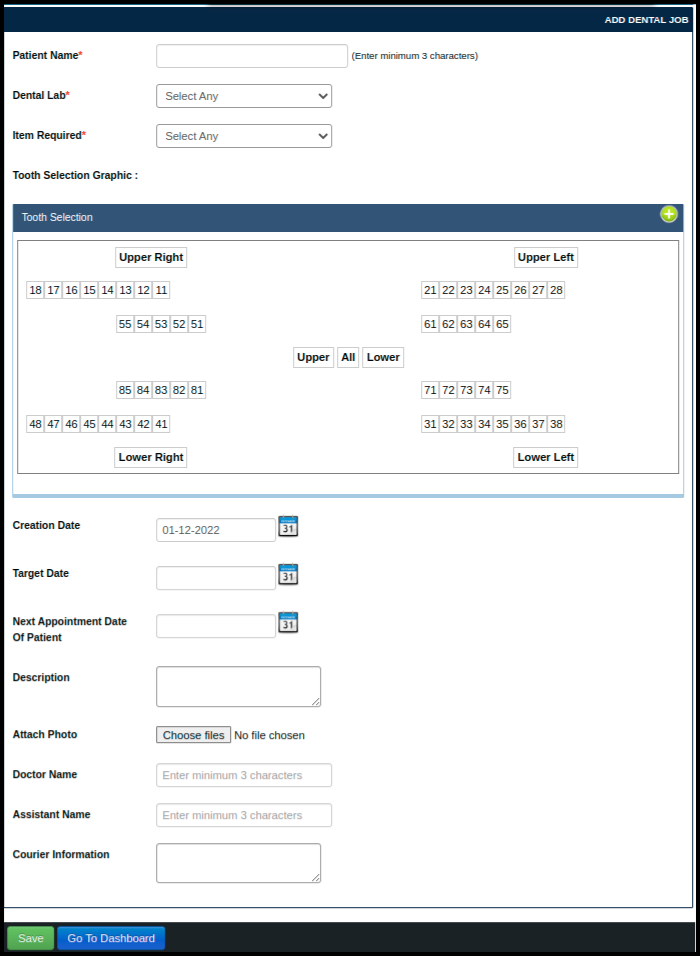
  • In the above image, there are a number of filed such as-
    I. Patient Name- We can search for patients here.
    II. Dental Lab- Name of the dental room.
    III. Item Required- Required items for dental work
    IV. Tooth Selection Graphic- In this field, we can see a visual of the tooth so we can select in which tooth we have worked.
    V. Creation Date- Date of the dental work.
    VI. Target Date- Estimated date of tooth recovery.
    VII. Next Appointment Date Of Patient- Follow-up date for next appointment.
    VIII. Description- we can add a description here.
    IX. X. Doctor Name- Name of the doctor who has done this dental job.
    XI. Assistant Name- Name of the assistant doctor.
    XII. Courier Information- If something is ordered from outside the hospital that thing will note in this box.
  • Just Fill the all data in the given fields and click on the save button.

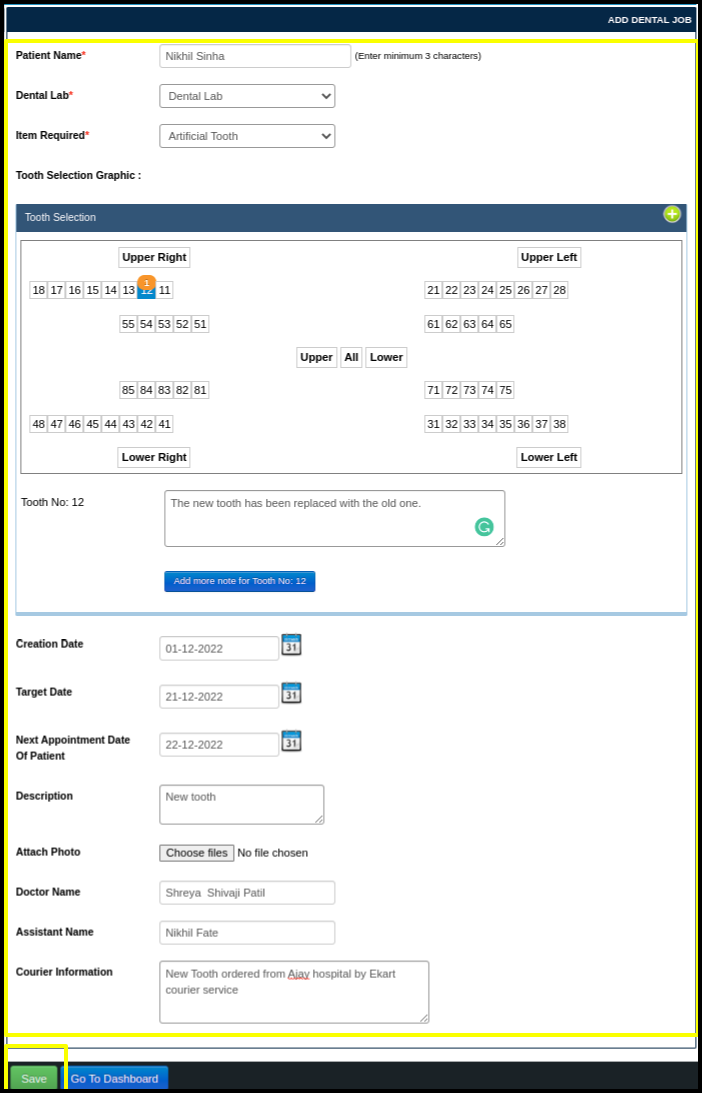
  • After clicking on the save button following window will display.

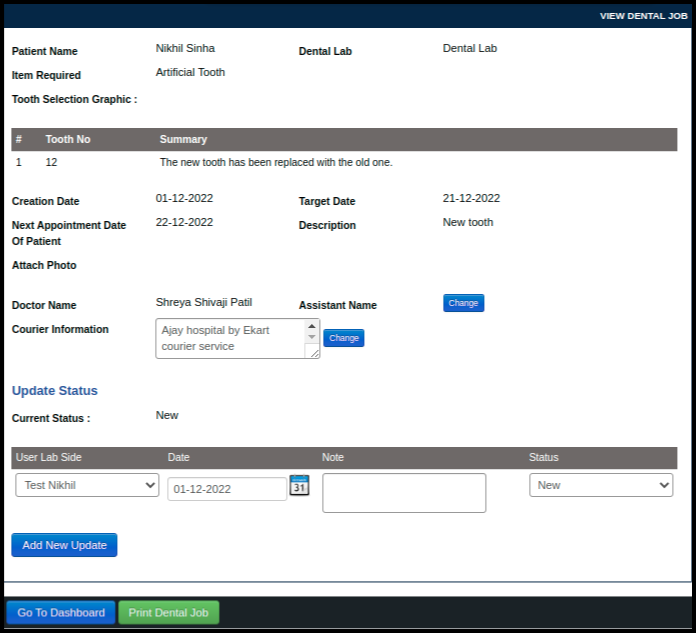
  • On this page, we can see all details which have been entered earlier.
  • And we can also add a new update by clicking on Add new update for the status of the dental lab.
  • To print the dental job just click on Print Dental Job Button.

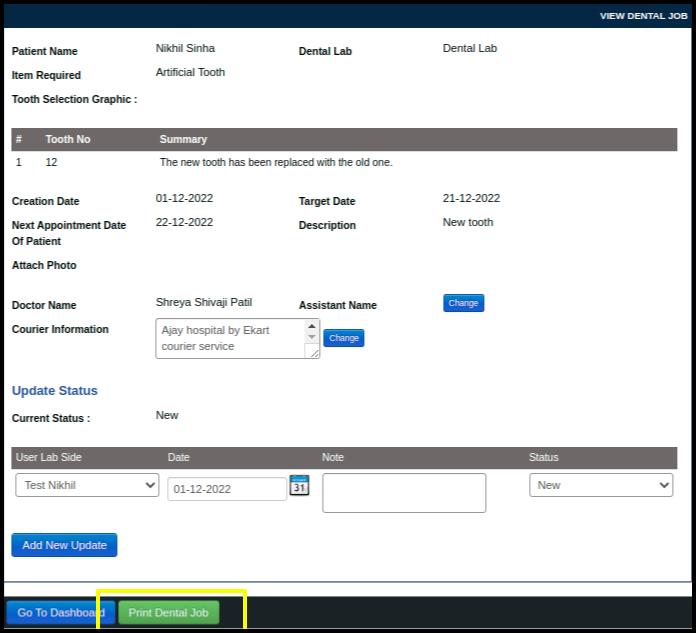
  • So basically Dental Job Management is used to keep track of dental job work.


Tags:appointment calenderConsultaion helperSave finalizeDental job managementPrevious request formAdd dental jobTooth selectionDental job detailsPrint dental jobDental consultation

Was this helpful?

Yes  No
Related Articles
  • Augnito Commands Feature
  • Print Prescription after saving an appointment(New Screen)
  • View the patient encounter details(New Screen)
  • Add Bulk Appointmnets
  • Patient Consultation Summary after saving an appointment
  • Helpers Against The Specific Services
Leave A Comment Cancel reply

Popular Articles
  • Create A Purchase Store
  • OPD Other Study Bill Report
  • Manage Helper Fields
  • Manage Password
  • Export All Leads
KB Category
  • Quick Links
  • Master Management
  • Inventory Management
  • Admit process
  • Scan & Share
  • Milestone 3
  • Milestone 2
  • Waste Management
  • Day Observation / Detention
  • Biomedical Waste Management
  • Dashboard
  • Accident & Emergency Ward Management
  • Milestone 1
  • ABDM
  • Blood Transfusion Request
  • Transfusion Medicine Unit
  • Operation Theatre Calendar
  • Listing
  • Appointment view
  • Listing
  • Pediatric
  • Appointment View
  • Mortuary Management
  • Management
  • Linen & Laundry
  • Request Blood Product
  • Blood Lab Service
  • Lab Service
  • Taxation Management
  • IPD From CPH
  • Recommendation Panel
  • Mortuary Reports
  • Mortuary plan
  • Oncology
  • NABH KPI Dashboard
  • NABH Dashboard
  • Dashboard
  • CPH
  • Surgery Recommendation
  • Inventory Dashboard
  • Calendar View
  • Dialysis Management
  • A & E Ward
  • OPD Reports Management
  • IPD Reports
  • OPD Reports
  • Others Bill Report
  • Accounts management
  • Management
  • ANC
  • Reports Management
  • Lead Status
  • Lead Management
  • Help and Support Management
  • Blood Bank Report
  • Appointment View
  • Dental Managment
  • Patient Record
  • Reports Managment
  • Schedule Status
  • Filters
  • Calender view
  • LIS
  • IPD
  • OPD
  • Pharmacy
  • IPD Patient Records
  • IPD Registered
  • IPD Bill reports
  • Station
  • Medicine PO
  • MIS Report
  • MIS
  • Medicine Report
  • Medicine Dispense
  • IPD Admission Process
  • Appointments and Scheduling
  • values and parameters
  • Consultation account
  • Master management
  • Ward status
  • Schedule Manager
  • Print report
  • Lab Process
  • Lab MIS Report
  • Pharmacy Reports

  Helpers Against The Specific Services

Patient Consultation Summary after saving an appointment  

plus91_logo
MediXcel is a flexible software solution for clinics, out-patient departments inside hospitals and clinic chains. It manages Medical Data of the patients and Administrative data of the practice. Its design lets user store data with ease, quickly retrieve data and use this data in various combinations and formats to make better decisions on patient treatment, customer service and practice profitability.
Company
  • Careers
  • Mission/Vision
Support
  • Knowledge Base
  • Video Manuals

[google-translator]

  • Policies
  • Certificates
  • © Plus91 Technologies All Rights Reserved